Configuration
To set up Voicemail to Email for an extension, perform the following steps:
- Open UCX Administration
- From the PBX tab, select PBX Configuration
- From the left side column, select Extensions
- From the list on the right hand side, select the desired extension
- Scroll down to the Voicemail section
- Set Status to Enabled
- Enter the user’s Email address – this is where notification will be sent for new voice messages
- To include the voice message as an attachment to the email notification, AND, to enable voicemail transcription feature select Yes for Email Attachment

The rest of the fields are optional. Details of the voicemail fields are described in the table below.
| Field | Description |
|---|---|
| Email Address | Email address that Voicemail is sent to. If you wish to specify multiple recipients, separate the email addresses with commas (,) or the pipe (|) symbol. This field supports up to a maximum of 160 characters. For example: [email protected]|[email protected]. |
| Pager Email Address | Pager or Mobile email address that short Voicemail notifications are sent to. |
| Email Attachment | Option to attach Voicemail to email. If E-Metrotel Email Service is Enabled, a transcribed copy of the voicemail will also be included. |
| Play CID | Read back caller’s telephone number prior to playing hte incoming message, and just after announcing the date nad time the message was left. |
| Play envelope | Controls whether the system will play the message envelope (date/time) before playing the message. This setting does not affect the operation of the envelope option in the advanced voicemail menu. |
| Delete Voicemail | If set to Yes, the Voicemail will be deleted after having been emailed. |
| Instant Access | When enabled, the password prompt is skipped when dialing into an extension’s voice mailbox directly from the extension. |
| VM Options | Additional options can be specified in this field that will override the system level settings. Separate the options with pipe ( | ). For example: tz=Eastern|maxmessage=60. See Voicemail Settings page for details on the various options. |
| VM Context | Normally set to the value default. Do not change unless you understand the implications. |
| Busy Message | If you want to use a system recording as the busy message, select the system recording file from the list. See System Recordings page for details on how to create a system recording. |
| Unavail Message | If you want to use a system recording as the unavailable message, select the system recording file from the list. See System Recordings page for details on how to create a system recording. |
System Level Configuration
Voicemail to Email settings at the system level are configured under the Voicemail Settings page.
- Open UCX Administration
- From the PBX tab, select PBX Configuration
- From the left side column, select Voicemail Settings
- Click on the Settings link (System View Links)
- Review and modify the following parameters as desired
| Field | Description |
|---|---|
| emailbody | This is the text that will appear in the email sent to users. Typically you would want to change the placeholder AMPWEBADDRESS to the actual IP address or hostname of your UCx Server. ${VM_NAME},\n\nThere is a new voicemail in mailbox ${VM_MAILBOX}:\n\n\tFrom:\t${VM_CALLERID}\n\tLength:\t${VM_DUR} seconds\n\tDate:\t${VM_DATE}\n\nDial *97 to access your voicemail by phone.\nVisit http://AMPWEBADDRESS/recordings/index.php?login=${VM_MAILBOX} to check your voicemail with a web browser.\n |
| emailsubject | The subject of the notification email sent to the user. |
| fromstring | The name of the FROM email address of the notification email sent to the user |
| serveremail | The FROM email address of the notification email sent to the user |
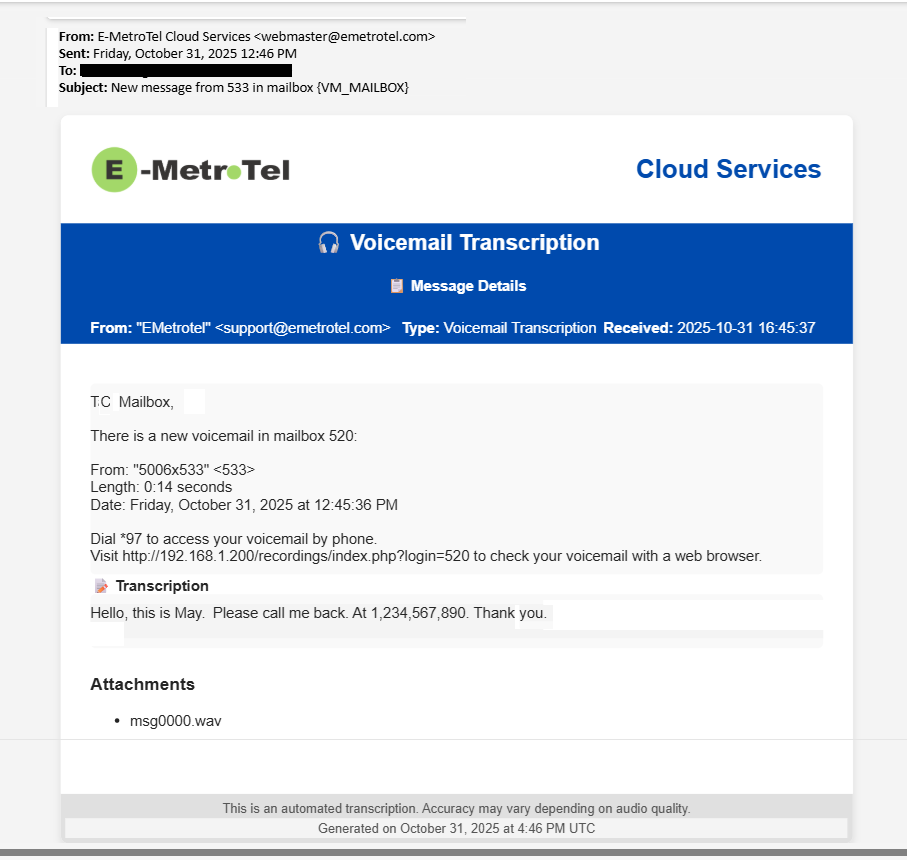
Here is an example of the email notification sent to the user with the following settings:
- emailbody = ${VM_NAME},\n\nThere is a new voicemail in mailbox ${VM_MAILBOX}:\n\n\tFrom:\t${VM_CALLERID}\n\tLength:\t${VM_DUR} seconds\n\tDate:\t${VM_DATE}\n\nDial *97 to access your voicemail by phone.\nVisit http://192.168.1.200/recordings/index.php?login=${VM_MAILBOX} to check your voicemail with a web browser.\n
- emailsubject = New message from ${VM_CIDNUM} in mailbox ${VM_MAILBOX}
- fromstring = EMetrotel
- serveremail = [email protected]
Cloud UCX without E-MetroTel Email Service
Troubleshooting
To investigate email issues, navigate to Support -> System Log Files page.
From drop-down list:
- Select maillog to review the messages sent via Remote SMTP.
- Select email_service.log to review the messages sent via E-MetroTel Email Service.
