Create Extensions
- Add a Virtual 32-Channel SIP Extension Card
- Add extension number and password for each handset at the V-SIP ext card
(E.g. 104 and 105) - Put the virtual card in service Ins.

- Enter the Names for these extensions in the Extension Settings (E.g. DECT277 and DECT577)

Verify SIP Port
Navigate to Slot – Site Property – Main page.
Check the Port Number.
The default value is 5060. The example shown is 15060.

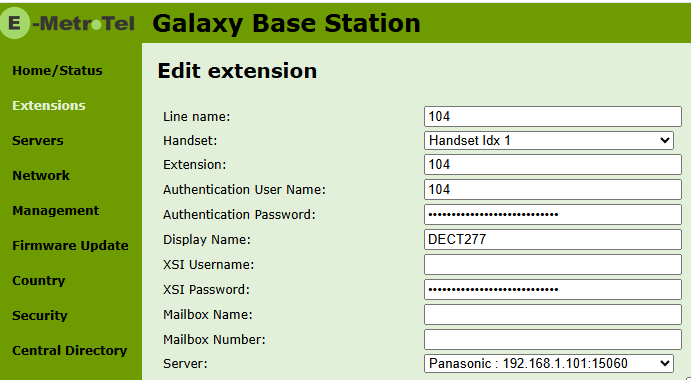
Configure E-MetroTel Galaxy DECT
For step by step instructions on configuring the Galaxy DECT Base Station, refer to DECT – Quick Start Guide.
STEP 1 – Configure Server
Enter the IP Address and SIP Port Number of the Panasonic PBX.

STEP 2 – Configure Extension
Add the desired extensions.
STEP 3 – Register Handset
The following steps are performed on the DECT handset.
- On the handset, click the Menu button. Three row of lines with a dot on the left side of the top row.
- Select Connectivity.
- Select Register.
- Enter Access Code that is found in the general Extensions page of the DECT base station (default is 0000).
From the DECT Base Station, navigate to Extensions -> Handset page.
Select the desired handsets and click Register Handset(s).

STEP 4 – Register SIP
- Go to Extensions page.
- Select the checkbox for the desired extensions or click on Check All Extensions
- Click on Start SIP Registration(s)

Verify and Test
On the DECT Base Station, SIP extensions should show a status of OK. 
On the Panasonic PBX, the SIP extensions should show a connection status of INS.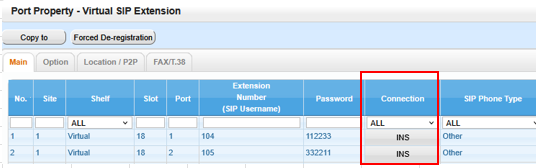
Make incoming and outgoing test calls.
