
This page describes the steps to perform bulk provisioning of the DECT base station and extensions using E-MetroTel’s DECT Provisioning Tool located on the Partner Portal.
From the UCX
STEP 1 – Create Extensions
Login to UCX Administration and create the desired SIP extensions to be assigned to the DECT handsets. (See Adding SIP Extension.) Refer to E-MetroTel – Product Licensing for required license types that support Infinity DECT phones.
Once you have all the extensions created:
- Navigate to PBX -> Batch Configuration -> Batch of Extensions page
- Click on Download CSV File button
- Save this file for Step 3

From the DECT Provisioning Tool
STEP 2 – Add Base Station
Login to the Partner Portal and navigate to Provisioning – DECT.
Select the Organization, enter the UCX Serial Number, Model and MAC address of the base station.
Click on +Add DECT Device button.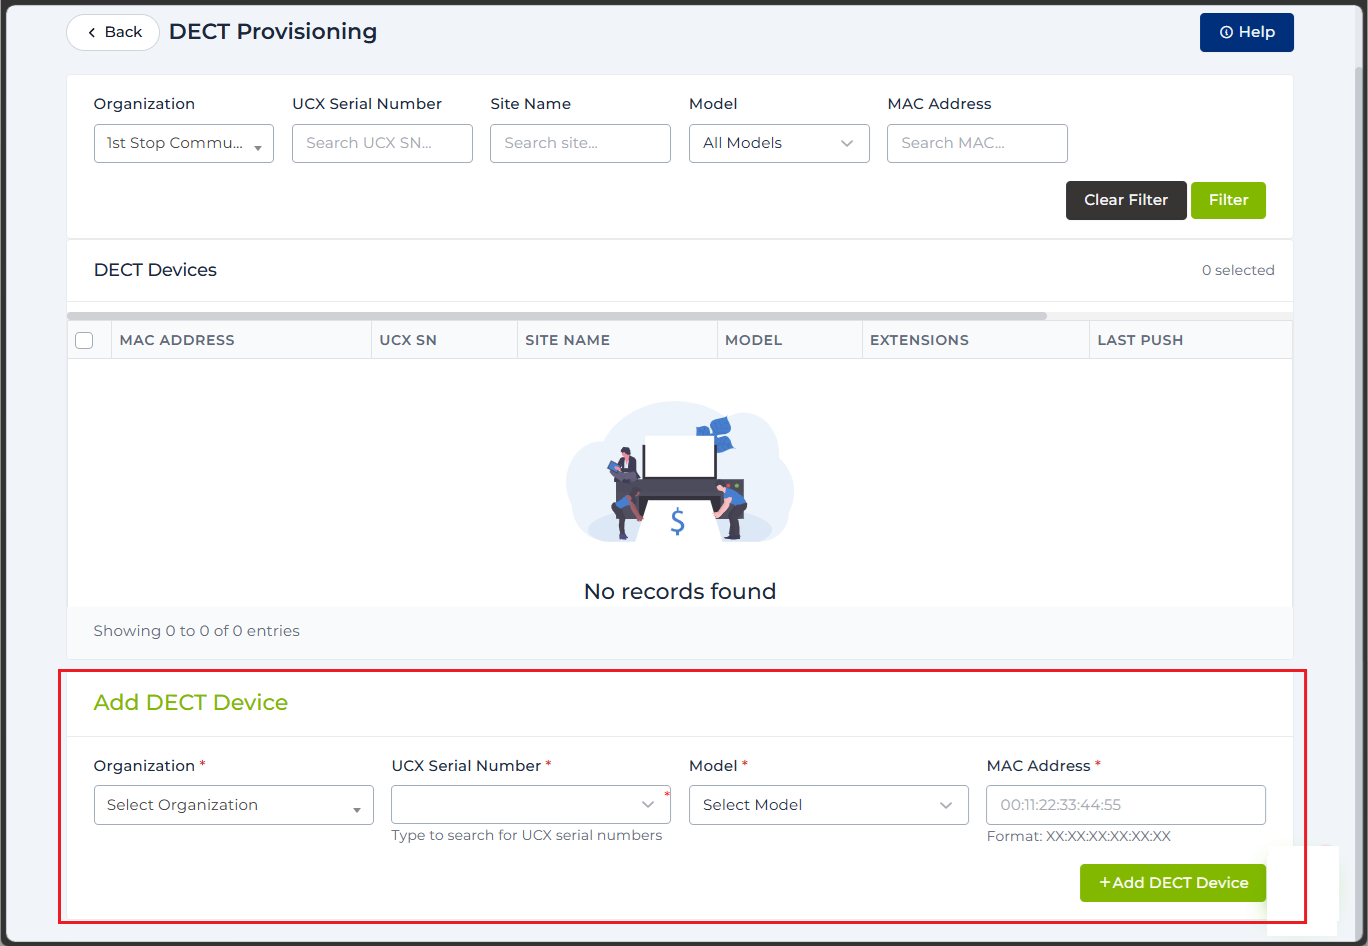
STEP 3 – Update Server
Click on the MAC address of the base station that was added in STEP 2 to edit the Base Station Details.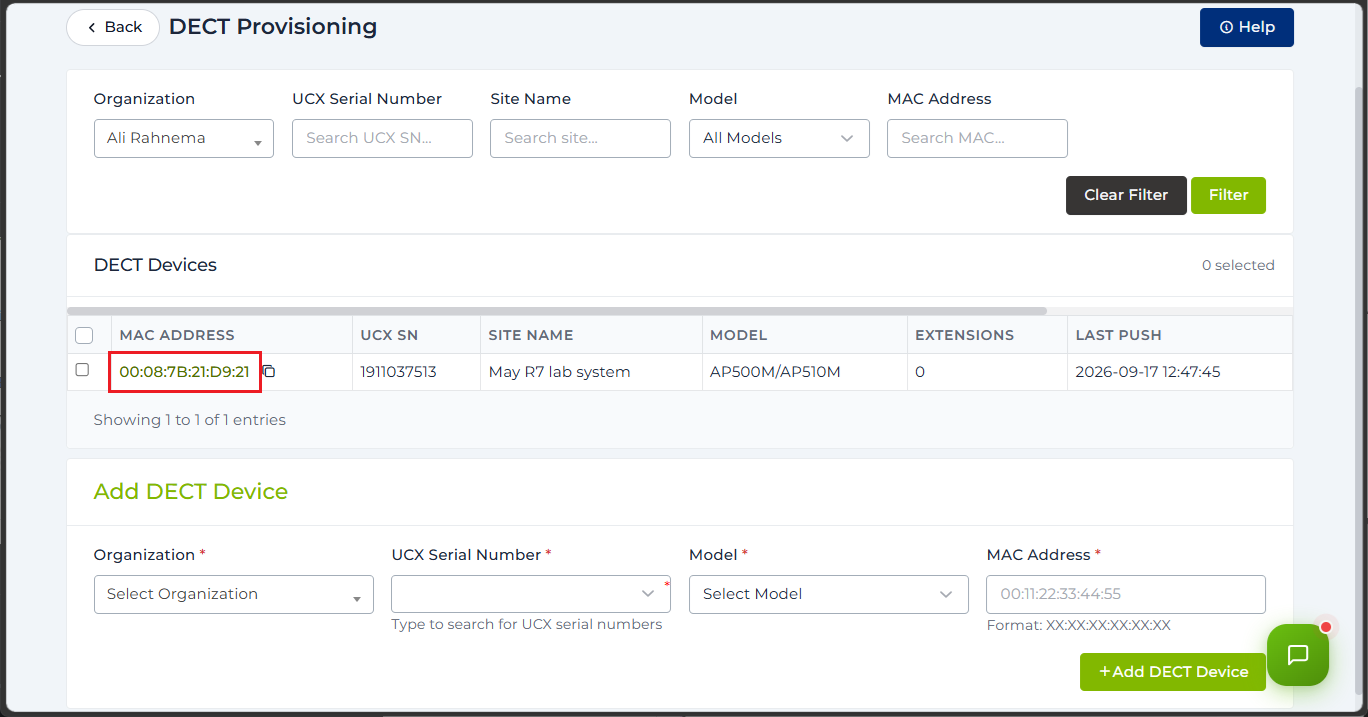
Fill in the Server details on the Server tab.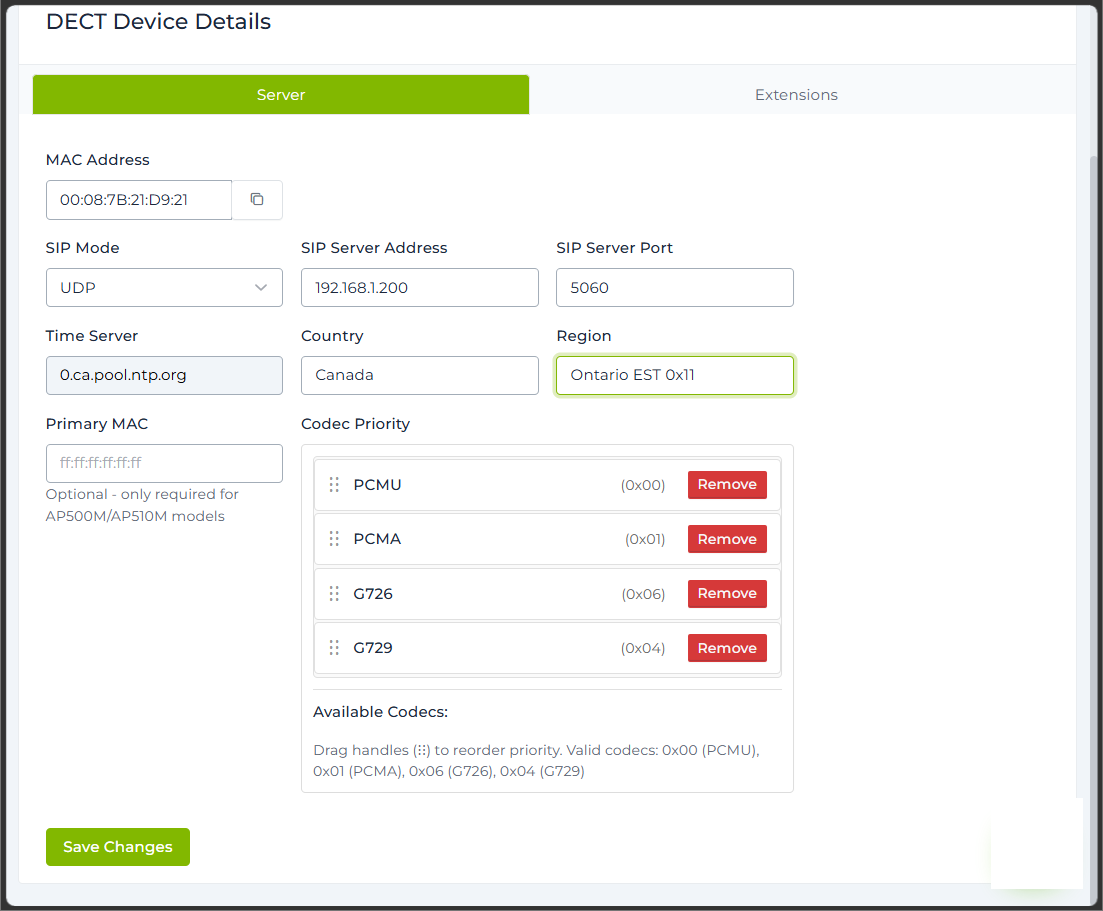
STEP 4 – Upload Extensions
Click on the Extensions tab.
Click on Choose File and find the CSV file saved in STEP 1.
Click the UPLOAD button to upload the SIP extensions.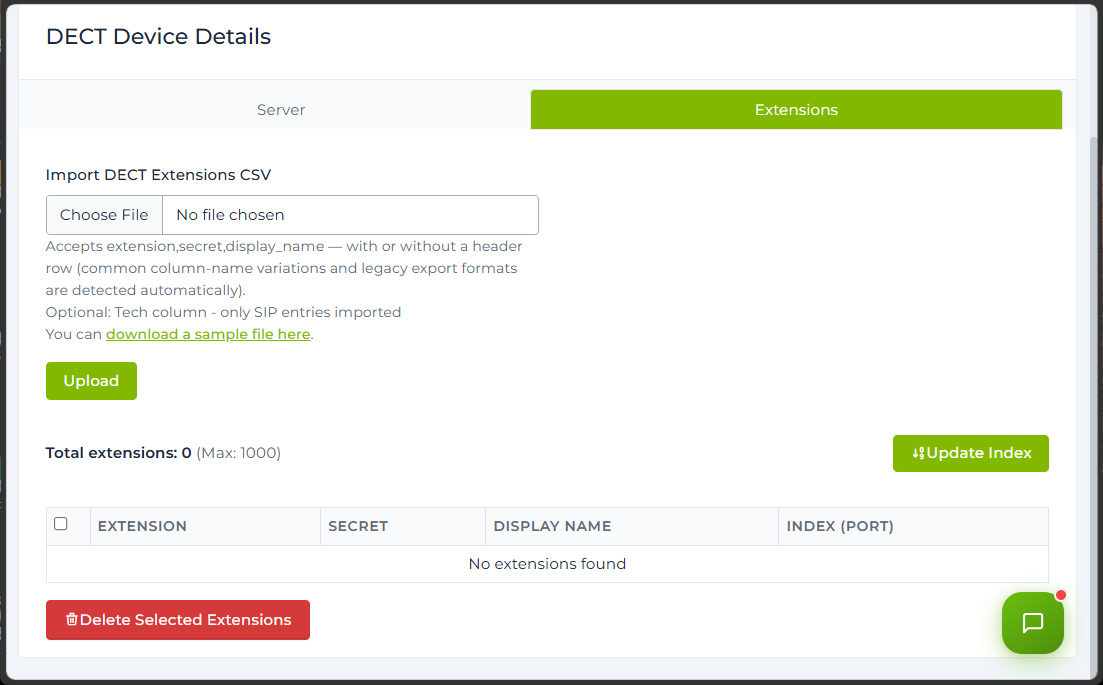
STEP 5 – Update Index
After the extensions are uploaded, they will be listed in the table.
Select and delete all the SIP extension in the list that are not meant for the DECT handsets.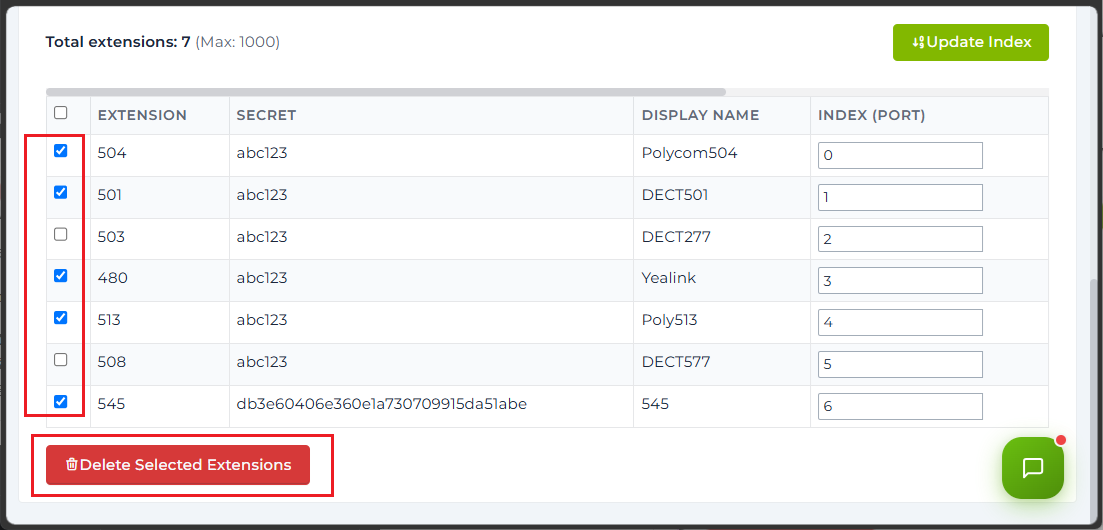
Click on UPDATE INDEX button to reorder the remaining list of extensions.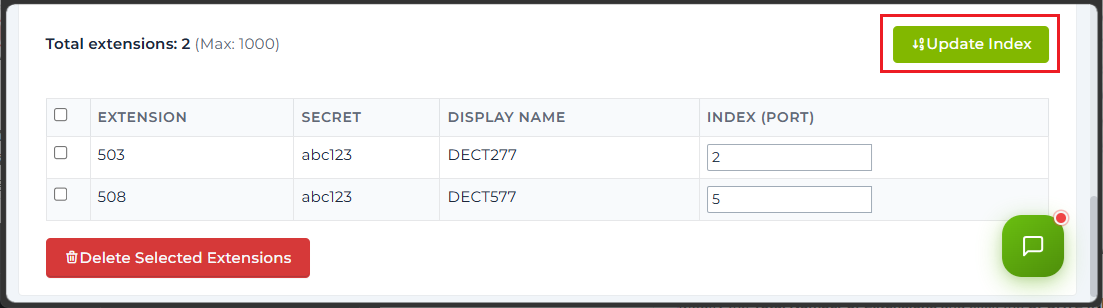
The list of extensions with the INDEX reordered.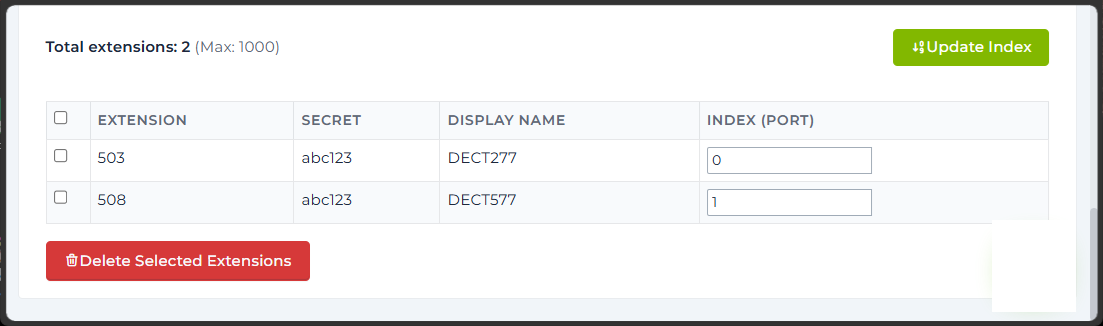
STEP 7 – Register Handset
From each handset:
- Select the Menu button
 .
. - Select Connectivity.
- Select Register.
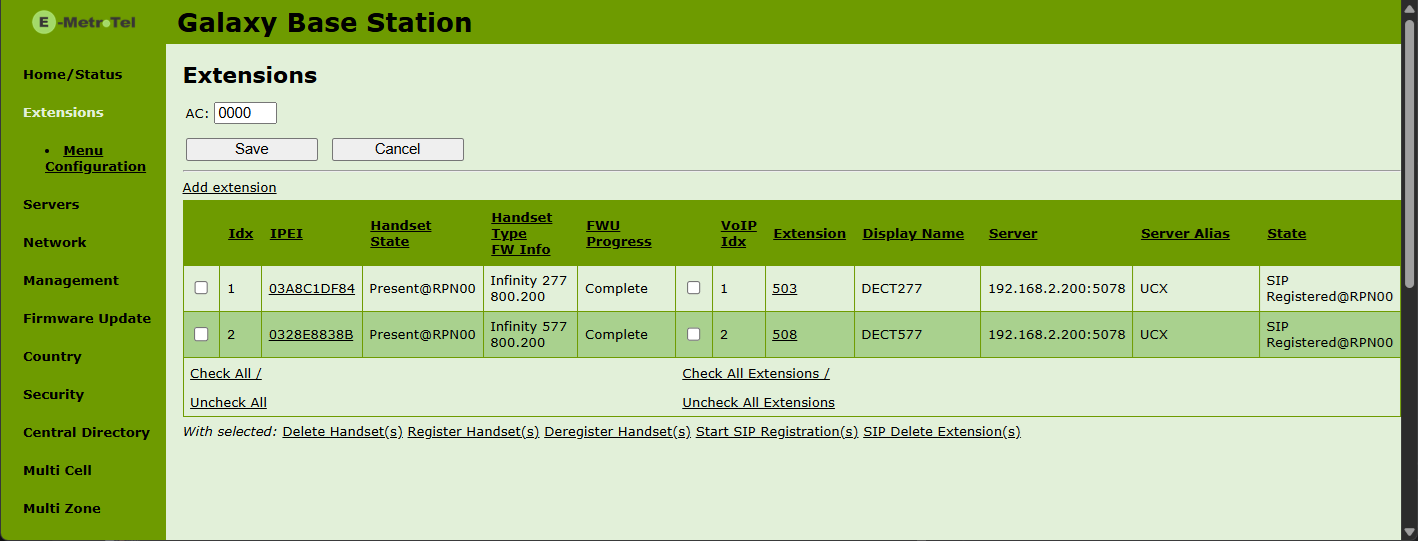
- Enter the Access Code that is found in the Extensions page of the DECT base station (default is 0000).
IMPORTANT:
The handsets will be automatically assigned an INDEX sequentially. The first handset to register will be assigned index 1, the second handset to register will be assigned index 2, and so on.
From the DECT Provisioning Tool
STEP 8 – Remove Extensions (Optional)
Upon successful configuration of a DECT system, it is recommended to remove the extensions from the list under the EXTENSIONS tab.
The provisioning tool contains the initial configuration information of all the SIP extensions to successfully register the phones. However over time, the passwords may change, the extensions assigned to handsets may change, the initial configuration information in the Provisioning Tool will therefore become outdated.
To prevent the system from accidentally re-provisioning with outdated configuration, delete the extensions from the provisioning tool.
If you choose to keep the extensions in the provisioning tool, be aware that the data may have outdated.
Multi-Cell System
For a Multi-Cell system, only one base station needs to be provisioned. The configuration will be automatically shared among the rest of the base stations.
On initial configuration, the administrator will specify the MAC address of the Primary base station. However the system will automatically optimize itself to reduce the number of hops in its connections. Hence it may change the Primary Base Station and reconfigure the DECT Chain.
Additional Information
Re-assign Handset to Extension
If there is a need to assign a different handset to the extension, perform the following steps:
- Un-register the previous handset first.
- Register the new handset.
- Click on Extensions on the left navigation panel.

- Click on the extension link and select the index of the new handset.

- Click Save.
