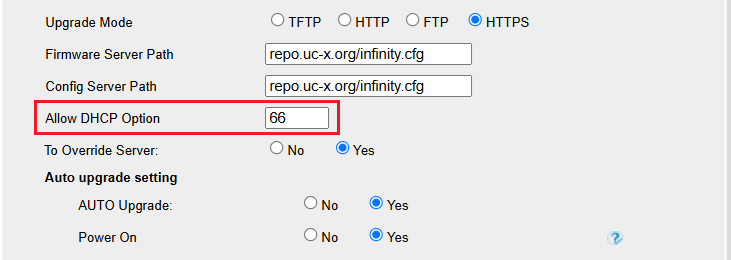
STEP 1 – Generate Configuration file
Login to the Partner Portal.
Filter and find just one phone to be installed at this site.
Edit the phone and configure the following fields.
Profile
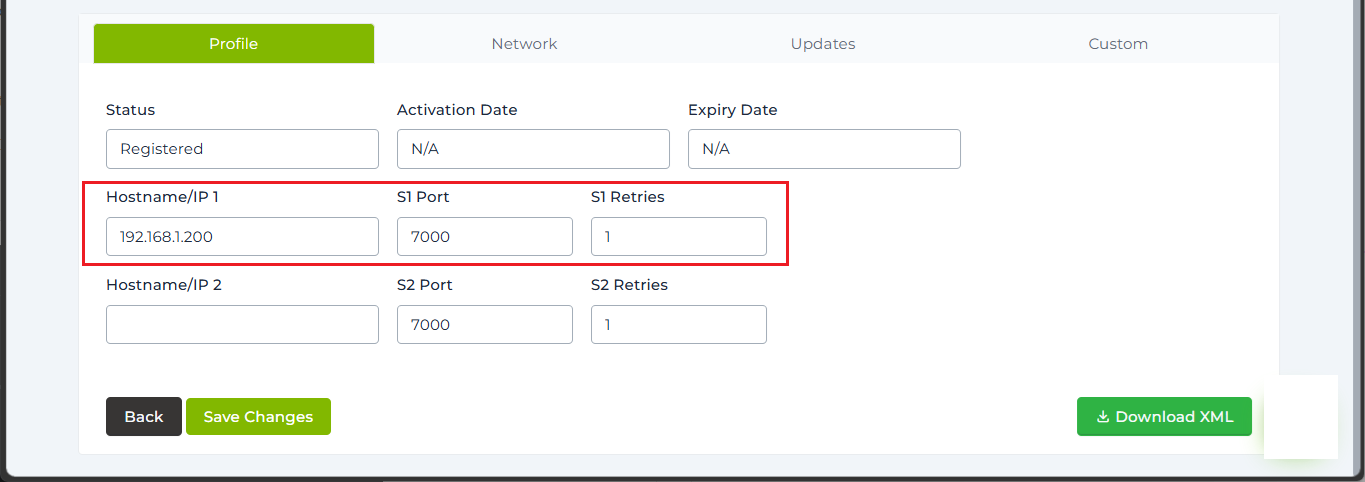
Under the Profile tab, configure the UCX Server information.
- Hostname/IP 1 = <UCX IP address>
- S1 Port = 7000
- S1 Retries = 1 or higher
Network
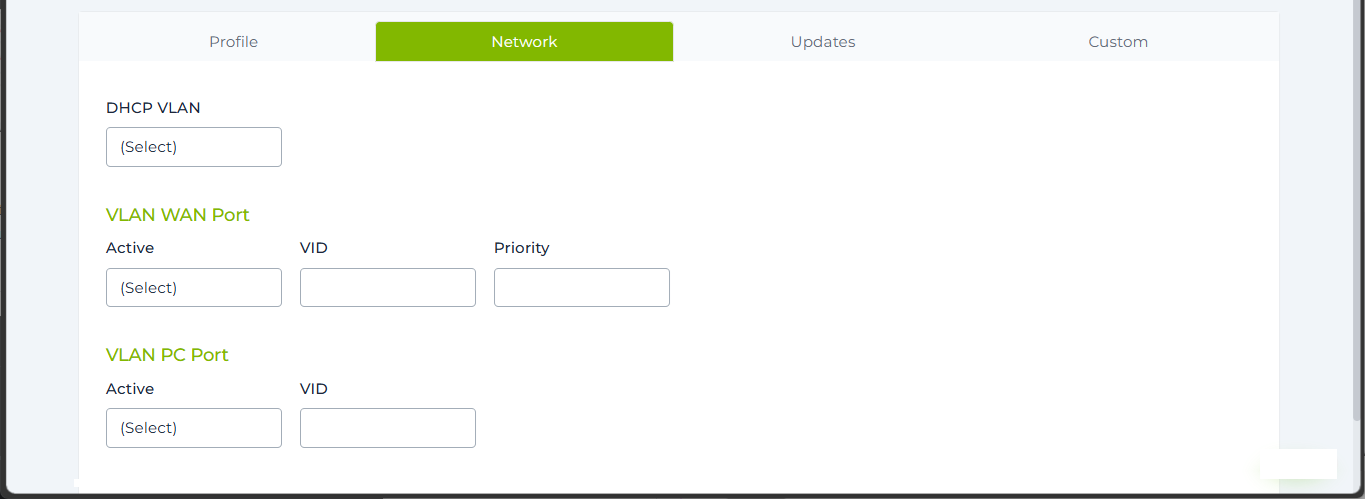
If you need to configure VLAN for the phone, update the parameters here under the Network tab.
Updates
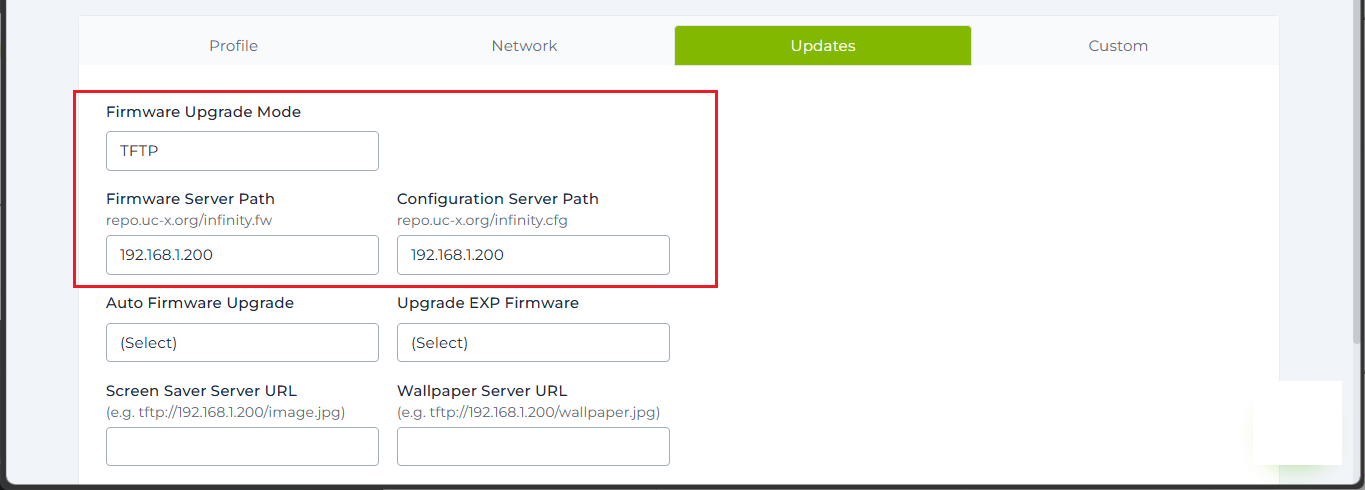
Under the Updates tab, set the mode to TFTP and point the configuration and firmware server paths to the UCX.
- Firmware Upgrade Mode = TFTP
- Firmware Server Path = <UCX IP address>
- Configuration Server Path = <UCX IP address>
Save and Download
Once all the fields have been updated, click on the Save Changes button.
Next click on the Download XML button and save the file on the local PC.

STEP 2 – Upload Configuration Files to UCX
The downloaded XML file from the previous step will have a filename looking similar to this:
cfg83C40E6F4C6A20A1BF7C34C6643EADA4.xml
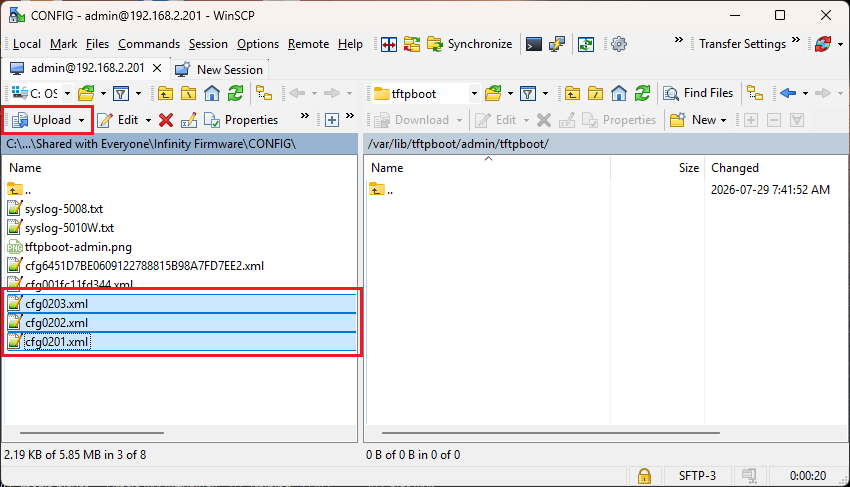
Make multiple copies of the same file, renaming the files to:
- cfg0201.xml (for all 5004 phones)
- cfg0202.xml (for all 5008 phones)
- cfg0203.xml (for all 5010W phones)
Use a file transfer client (e.g. WinSCP) to connect to the UCX. Login using the admin account.
From the root directory of UCX, navigate to /tftpboot sub-directory.
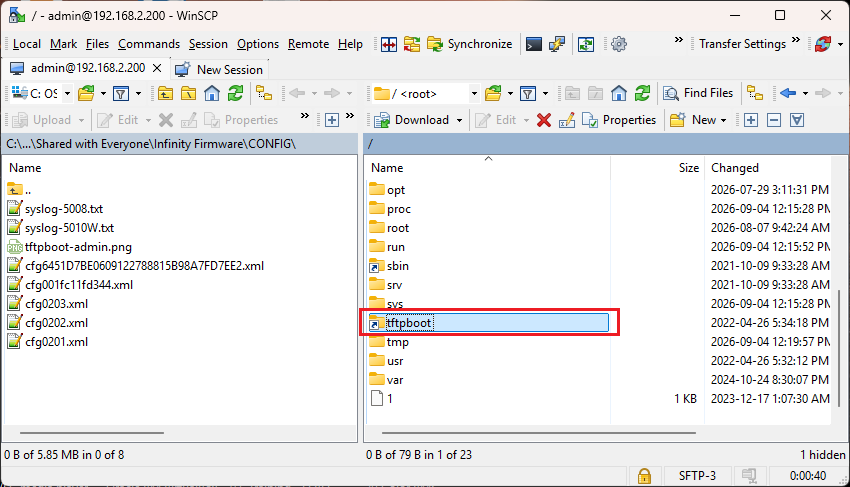
Upload the 3 XML files to the /tftpboot sub-directory.
STEP 3 – Configuration on the UCX
Enable TFTP
Login to UCX Administration.
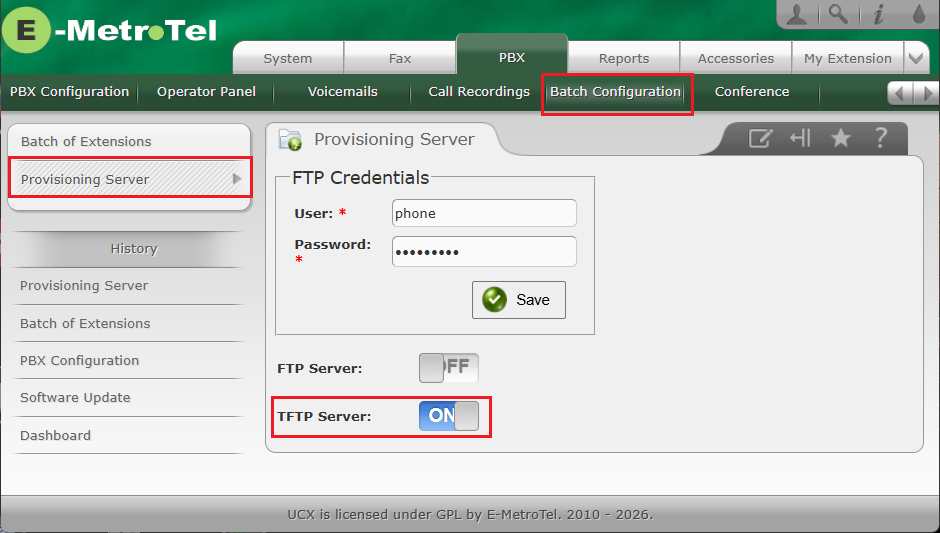
Navigate to PBX -> Batch Configuration -> Provisioning Server page.
Toggle TFTP Server to ON
Install Phone Firmware package
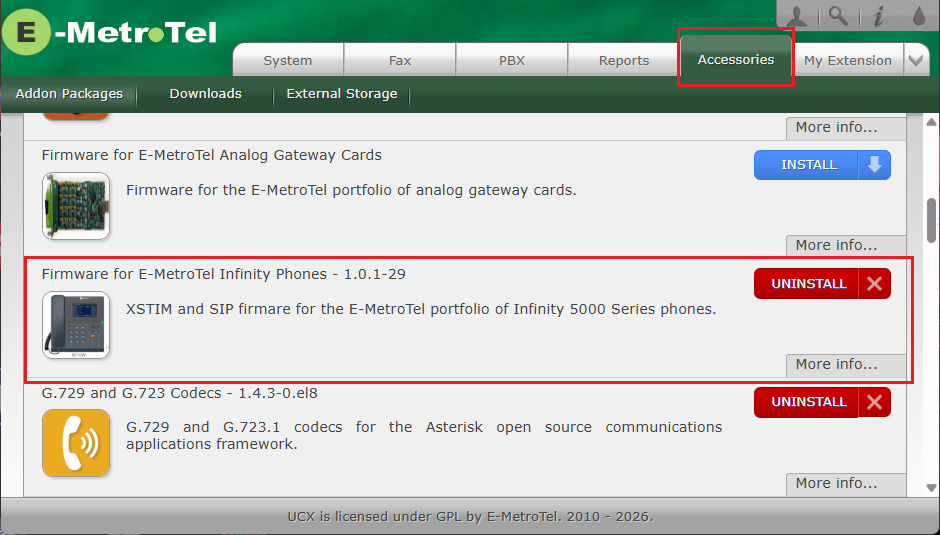
Navigate to Accessories -> Addon Packages page.
Install Firmware for E-MetroTel Infinity Phones.
STEP 4 – Configure DHCP Option 66
On the DHCP Server, configure DHCP Option 66 pointing to the static IP address of the UCX Server. E.g. tftp://192.168.1.200.
The 5000 Series phones by default will have DHCP Option 66 enabled.
When the phone boots up, it will obtain the Provisioning Server address from DHCP Options first.