

Network Parameters
The Network Parameters page allows you to view/change the network configuration of your UCX system.
To use the UCX system on your LAN, you have to set its network configuration to match your network. You should update some or all of the following properties:
- IP address and subnet mask
- Host name
- Default gateway
- DNS server(s)
To access the network parameters for your UCX system, perform the following steps:
- Open the UCX Web-based Configuration Utility
- From the System tab, select Network
- From the left side column, select Network Parameters
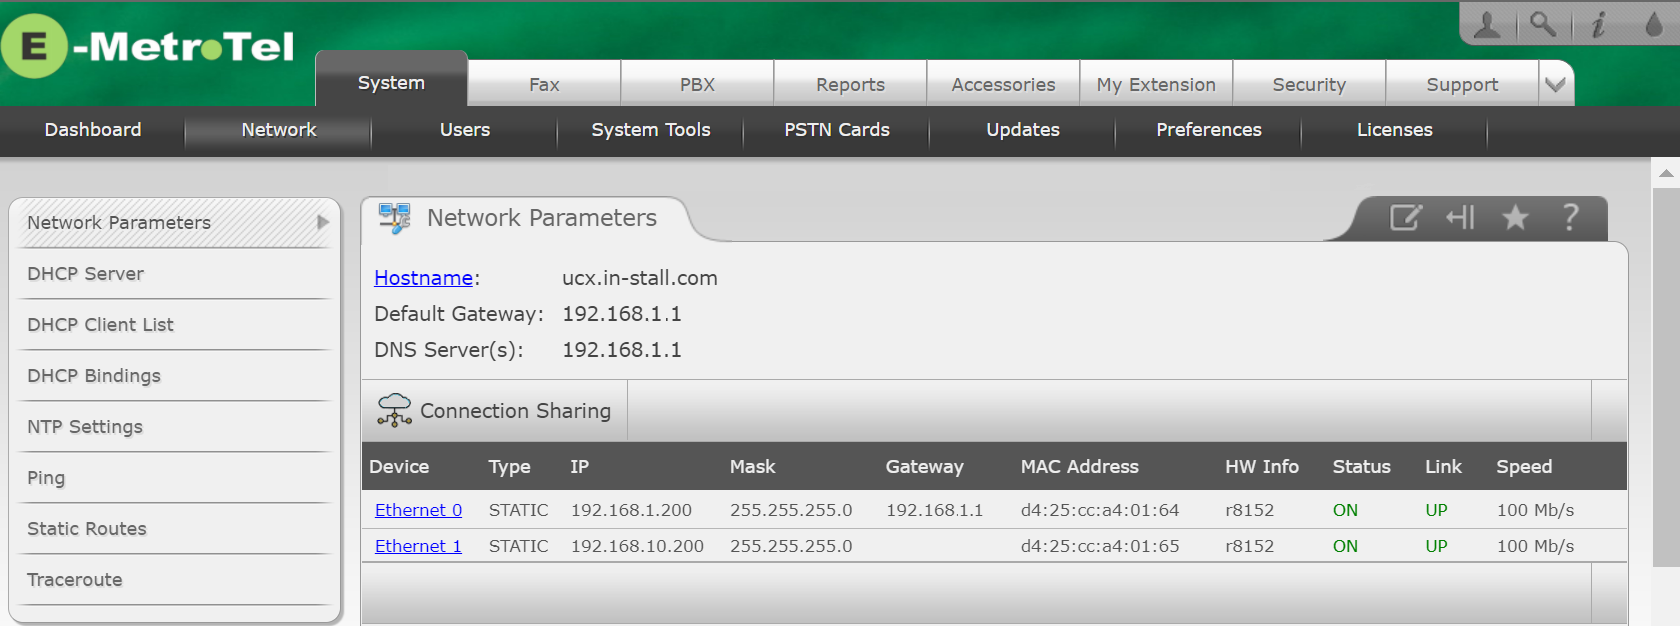
Network Parameters
To change the host name, perform the following steps:
- From the Network Parameters page, click the Hostname link.
-
Enter a fully qualified domain name for the UCX system (e.g., ucx.mycompany.com - or ucx.localhost if you do not want to use a fully qualified domain name for the system)
- Press the Save button to update the hostname configuration of the UCX system.

Interface Parameters
To change the IP address and subnet mask of your UCX system to match the customer network, perform the following steps:
- Open the UCX Web-based Configuration Utility
- From the System tab, select Network
- From the left side column, select Network Parameters
- There will be between one and three devices listed on the page, select the first interface device to view its properties.
-
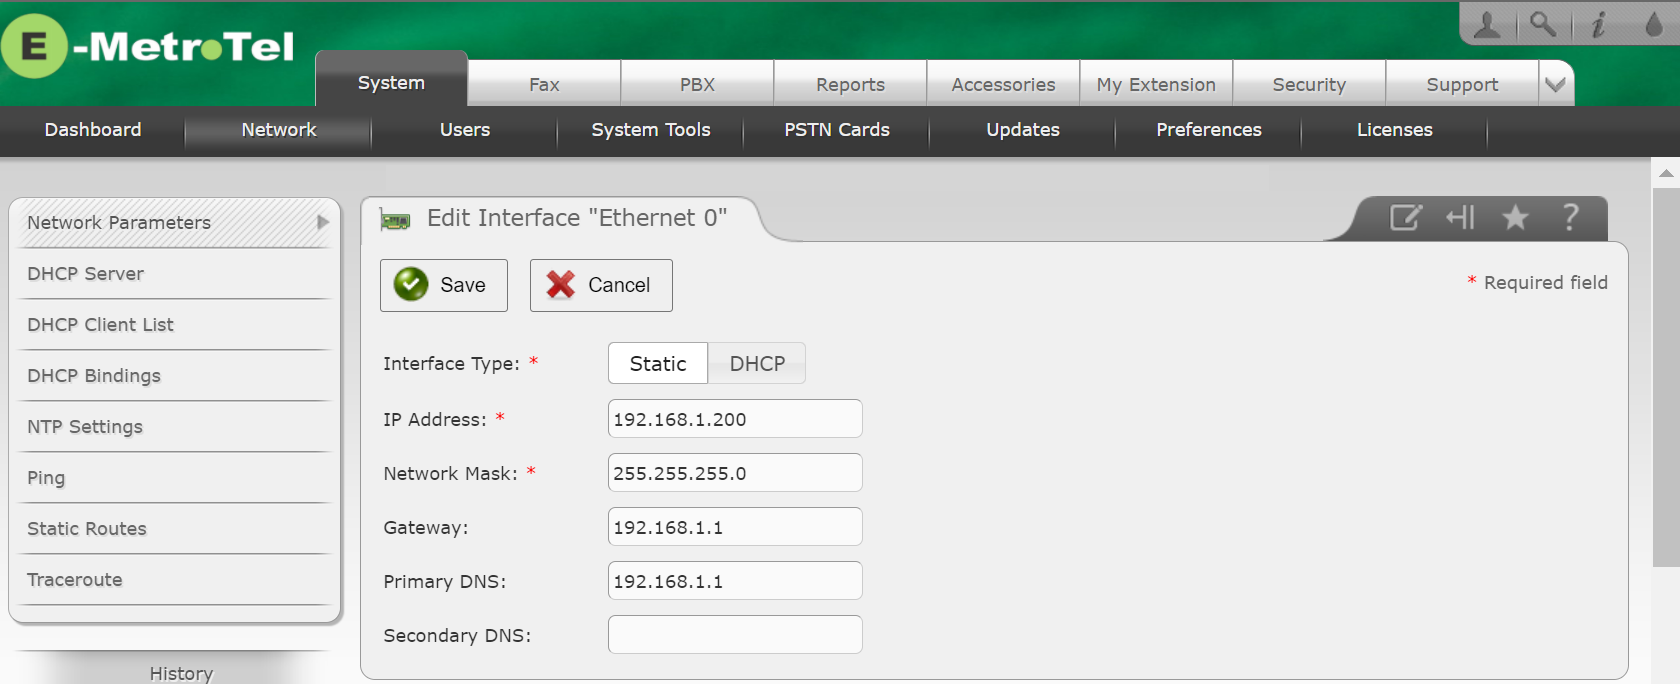
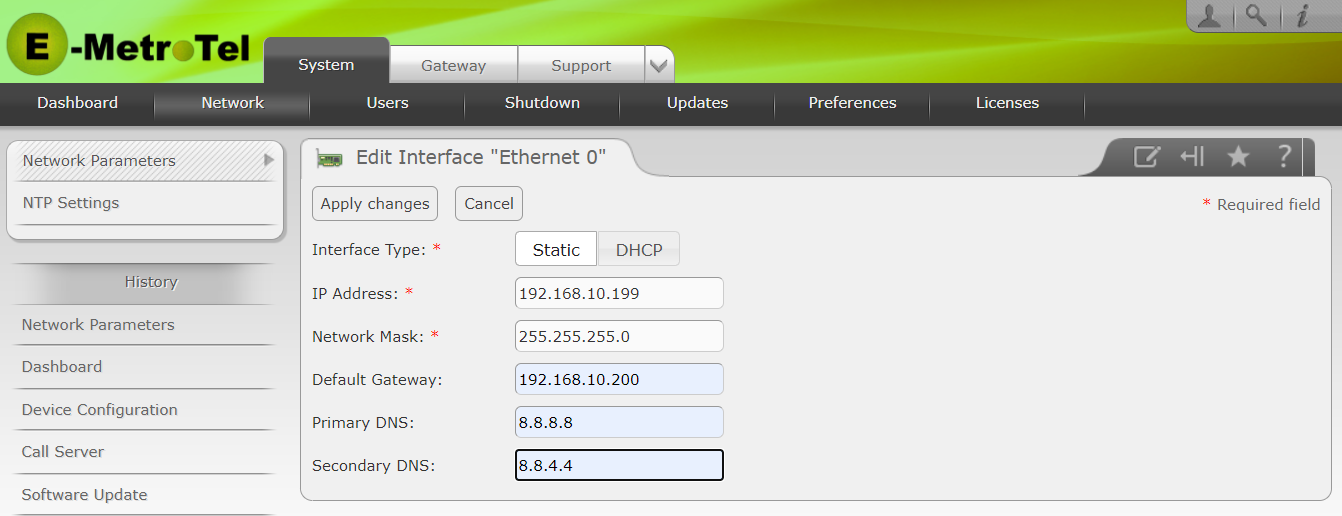
If the Interface Type is Static, configure the following fields:
- IP address
- Network Mask (subnet mask)
- Gateway
- If your router can relay DNS requests, specify the IP address of your router also in the Primary DNS field. Otherwise, enter the IP address of your preferred DNS server.
- You can set the Secondary DNS field to your preferred secondary DNS server or you can use a public DNS server (e.g. 8.8.8.8) as the secondary DNS server.
- If you choose to use Interface Type DHCP for your UCX system, the following fields will be disabled.
- Press the Apply Changes button.
Connection Sharing
Many Galaxy devices are equipped with multiple network interfaces, providing the flexibility to connect all E-MetroTel peripheral equipment such as DSM16p cards on a LAN network independent of the customer LAN. While this configuration isolates the UCX related telephony traffic from the customer traffic, it has previously impacted the ability to update the software on the DSM16s without temporarily reconnecting the DSM16 devices to a network that does have direct internet access.
Connection Sharing is a feature that allows the UCX software running on Galaxy hardware equipped with two or more network interfaces to pass traffic destined for the internet directly from one interface to another. In this way, when a System Update request is made from a properly configured DSM16p, the request can successfully pass through the private LAN interface on the Galaxy platform and be forwarded to the internet through the public LAN interface. The response packets will be allowed to pass back from the public LAN interface to the selected private LAN interface, enabling the System Update process to continue.
Network Configuration
Requirements for Connection Sharing:
- The Galaxy or UCX platform must have at least two active network interfaces
- One interface must be connected to the internet using either a static IP address or DHCP assignment.
- At least one additional interface must be enabled
- The target Private interface must be configured to use static IP address
Configuring Connection Sharing in UCX Software
To configure the settings for Connection Sharing, perform the following steps:
- Open the UCX Web-based Configuration Utility
- From the System tab, select Network
- From the left side column, select Network Parameters
-
If your system has two or more active network interfaces, the Connection Sharing button will be visible above the list of network interfaces.
-
After clicking on the Connection Sharing button, the following configuration screen will appear:
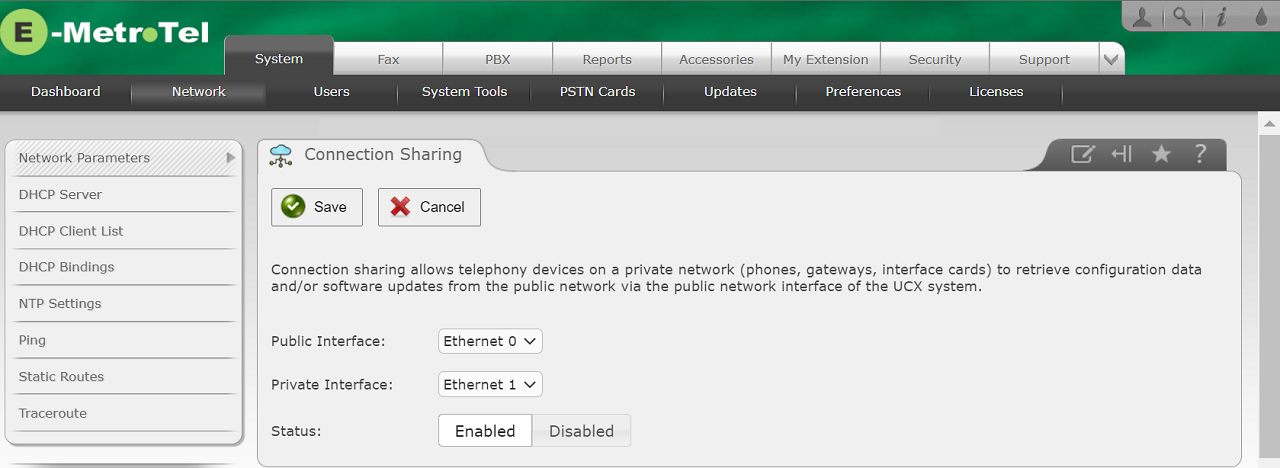
- The UCX software automatically detects which network interface is connected to the internet and will select it as the Public Interface
- Any additional ethernet interfaces configured with a static IP address will be shown in the drop down selection box for the Private Interface selection. Select the interface where E-MetroTel devices are such as DSM16p's and phones are connected.
- In order to use the Connection Sharing, click on Enabled.
- If you wish to stop using the functionality, click on Disabled
- To begin Connection Sharing, press the Save button.
-
When the Connection Sharing feature has been activated, the button will change color as shown below:

Configuring the DSM16 to use Connection Sharing
In addition to configuring and enabling the UCX Connection Sharing feature, the DSM16 network configuration must be set to use the UCX as the defualt gateway for its internet traffic.
- Open the DSM16 Web-based Configuration Utility
- From the System tab, select Network
-
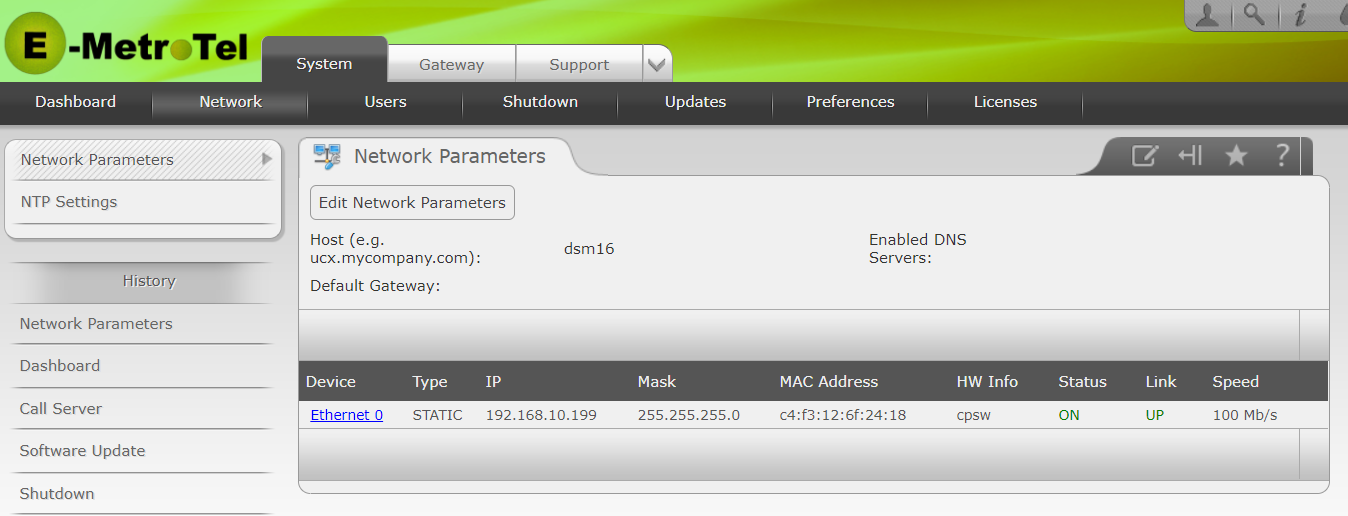
From the left side column, select Network Parameters

-
Click on Ethernet 0

- Ensure the IP Address and Network Mask are compatible with the Private Interface parameters on the UCX software, with Interface Type of Static or DHCP.
- Ensure that the Default Gateway is the IP Address of the ethernet interface used as a Private Interface in Step 7 of Configuring Connection Sharing in UCX Software, above.
- Ensure that at least one valid DNS server is configured.
- Click on Apply Changes
At this point, you should be able to follow the instructions for updating the DSM16 software with the option to configure Automatic Updates.