VVX 500 Series
Table of Contents
1. Introduction
2. Configuration
2.3.1 Accessing the phone's web interface
2.3.2 Configure Date and Time
2.3.3 Configure SIP Server and Line
2.3.4 Configure Message Center
2.3.5 Configure Line Keys
2.3.6 Configure Soft Keys
2.3.2 Configure Date and Time
2.3.3 Configure SIP Server and Line
2.3.4 Configure Message Center
2.3.5 Configure Line Keys
2.3.6 Configure Soft Keys
1. Introduction
The Polycom VVX 500 is a high-performing, 12-line Gigabit IP Phone that meets the needs of executives and managers who have heavy voice communications requirements. The Polycom VVX 500 combines an attractive new ergonomic design with wideband audio (HD Voice) for crystal clear voice communications, Gigabit connectivity, 3.5-inch color touchscreen LCD display, and supports up to 12 SIP accounts.
Features include:
- 3.5'' (9-cm) TFT Touchscreen Display (320 x 240)
- 12 lines or speed dial keys
- HD Voice up to 14KHz on all audio paths (Speaker, Handset, Headset)
- 2 x Ethernet 10/100/1000, 2 x USB 2.0 host
- Full Browser (Webkit) Hard Keys, Home, Mute, Volume
- Supports Expansion Modules
- Supports USB Cam For Video Conferencing
- Supports RJ9 USB Headsets
- Streaming media video playback

2. Configuration
2.1 On the UCX Server
- Login to the UCX Web-based Configuration Utility
- Navigate to PBX - PBX Configuration - Extensions page
-
Add an Extension for a Generic SIP Device with the following basic parameters:
- User Extension (e.g. 221)
- Display Name
- secret
- If the UCX Server is Cloud hosted, under Device Options, set NAT Mode to Yes.
- Click on Submit to create the extension
- Press the Apply Config bar at the top
2.2 On the VVX 500 Series Phone
Refer to https://www.poly.com/us/en/support/products/business-phones/vvx/vvx-500 for details on phone setup and usage.
Connect the phone to a network that is setup for DHCP. After initialization is complete, perform the following steps to obtain the IP address assigned to the phone:
- From the phone, press the Home key.
- Press Settings - Status - Platform - Phone.
- The display will show the IP address.
2.3 Configuration via Web Interface
2.3.1 Accessing the phone's web interface
-
From a web browser, enter the IP address of the phone. (For example: https://192.168.1.131)
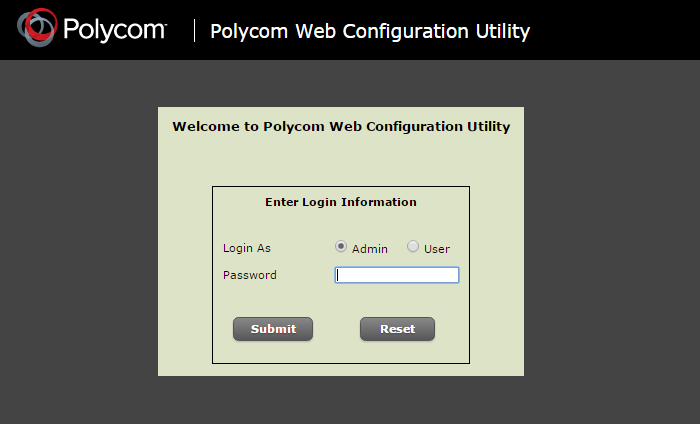
- Login as Admin, the default password is 456.
2.3.2. Configure Date and Time
-
From the top navigation menu bar, select Preferences -> Date & Time
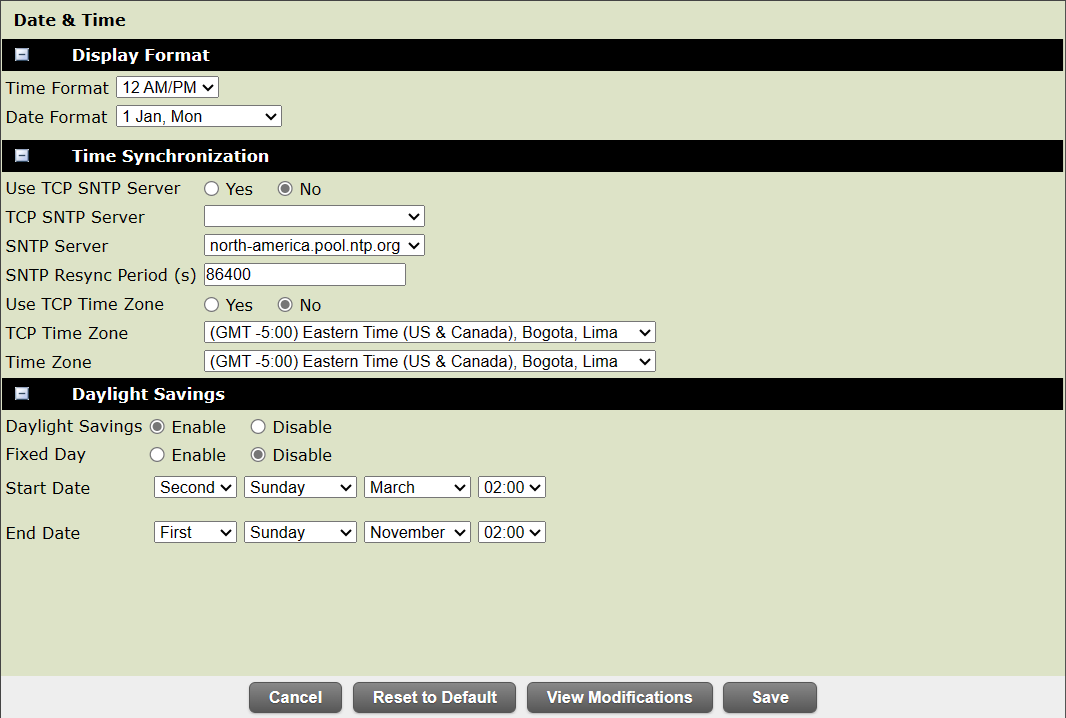
- Select a SNTP Server from the pull-down list.
- Select the desired Time Zone.
- Press the Save button.
2.3.3 Configure SIP Server and Line
-
From the top menu bar, navigate to Settings -> SIP
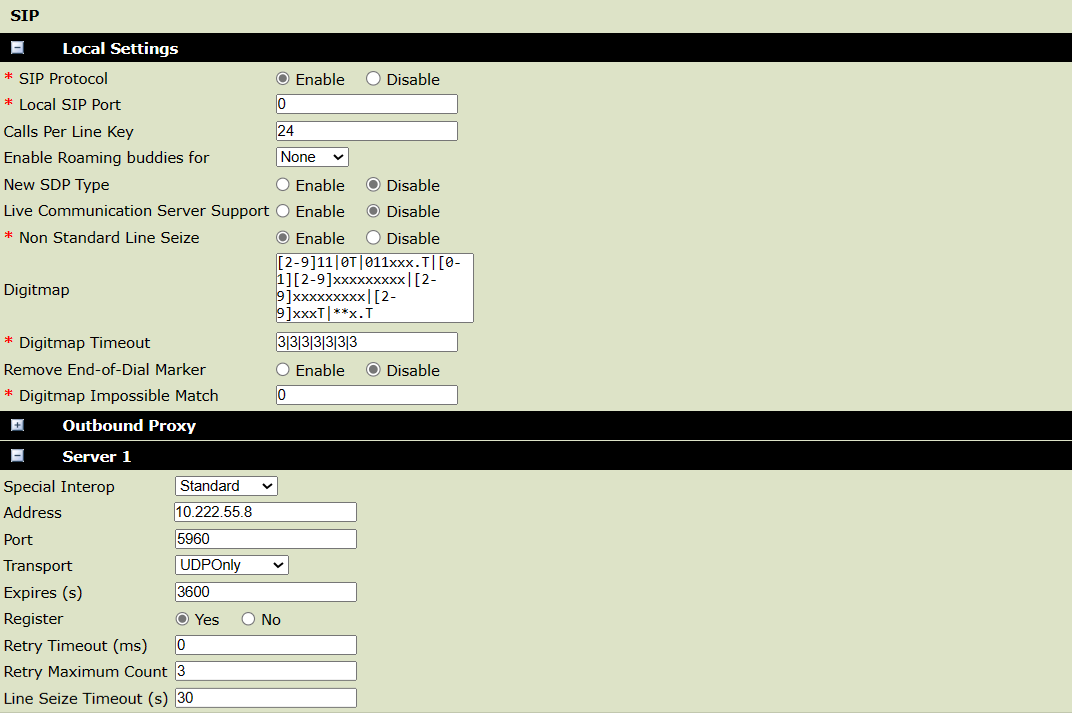
- Update the Digitmap dial plan information as desired.
- Change Remove End-of-Dial Marker field to Disable if you want to allow the use of # sign to dial immediately.
-
Under Server 1, update the following fields:
- Address: Enter the IP address of the UCX Server
- Port: Enter the SIP port used (default is 5060 or 5960 for Cloud UCX)
- Transport: Select UDPOnly
- Press the Save button.
-
From the top menu bar, navigate to Settings -> Lines, select the desired line from the panel on the left.
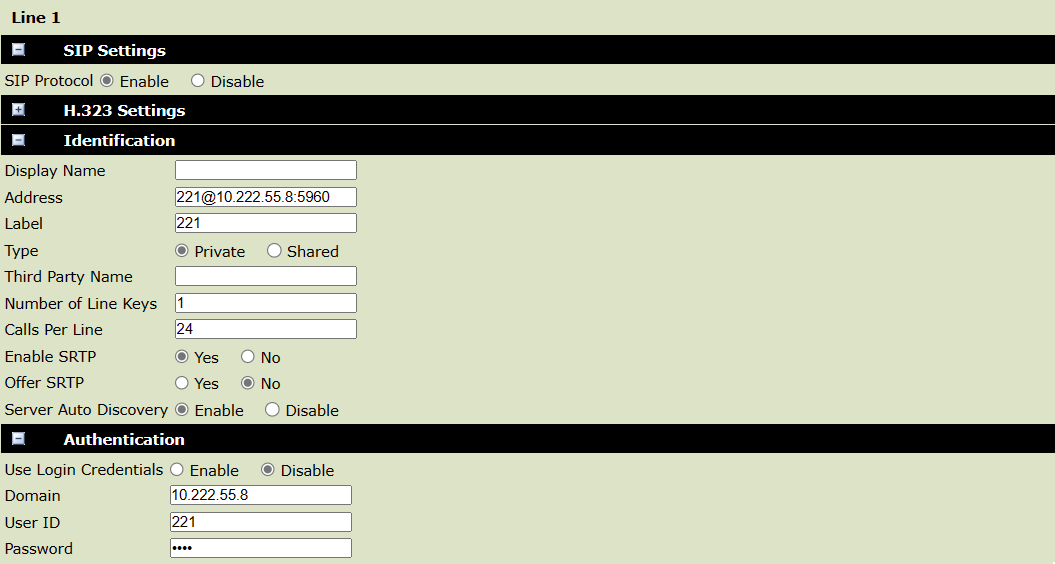
-
Under Identification, update the following fields:
- Display Name: Enter the CallerID display name
-
Address: Enter the SIP URI <extension>@<server>:<port>, e.g. [email protected]:5960
Important: You must include the port number if it is NOT the default port 5060. - Number of Line Keys: Enter the number of line keys for this extension
-
Under Authentication, update the following fields:
- Domain: Enter the IP address of the UCX Server
- User ID: Enter the user extension from STEP ONE
- Password: Enter the secret from STEP ONE
- Press the Save button.
- The phone display will now show a registered line(s).
2.3.4 Configure Message Center
-
From the top menu bar, navigate to Preferences -> Additional Preferences
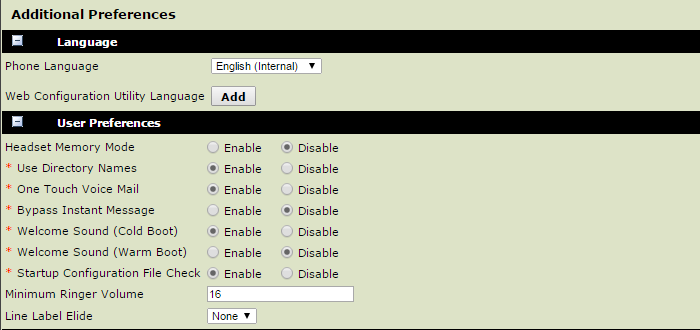
- To immediately dial voicemail when the Messages key is pressed, Enable the One Touch Voice Mail field.
-
Next, navigate to Settings -> Lines and select the desired line from the left side panel.
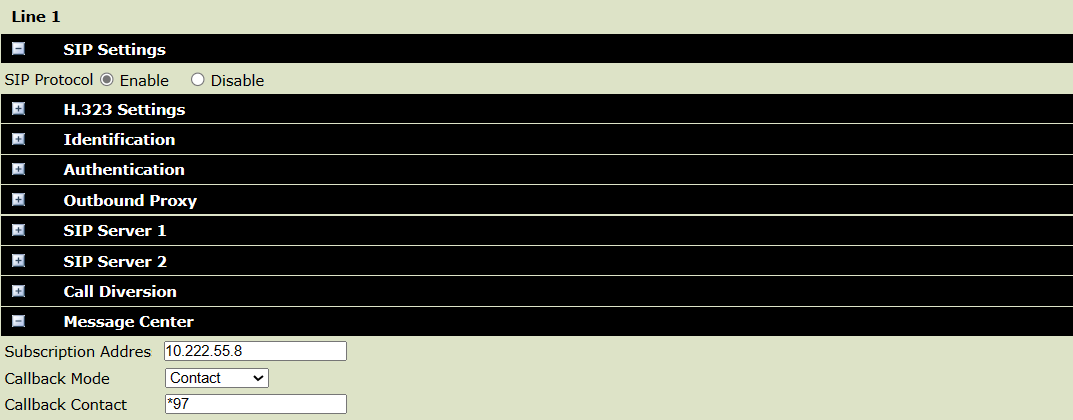
-
Under Message Center, update the following fields:
- Subscription Address: Enter the IP address of the UCX Server
- Callback Mode: Change the mode to Contact
- Callback Contact: Enter the value *97
- When you have new voicemail message(s), the Message Waiting Indicator located at the top-right of your phone will flash.
- To retrieve your voicemail messages, press the Messages key.
2.3.5 Configure Line Keys
-
From the top menu bar, navigate to Utilities -> Line Key Configuration

-
To edit a configured line key, just select the line from the Active Line and Speed Dial Keys box.
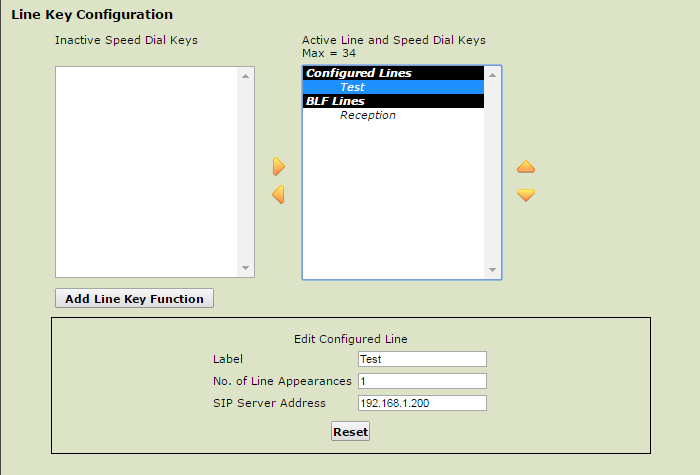
- Make the desired changes in the Edit Configured Line box and press the Save button at the bottom of the page.
-
To add a new line key, press the Add Line Key Function button.
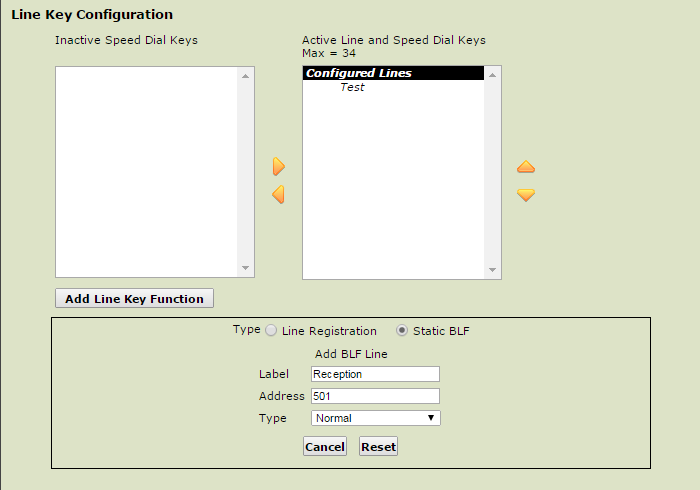
- Update the fields in the box that appears.
- Press the Save button at the bottom of the page to add the line key.
2.3.6 Configure Soft Keys
To customize the soft keys on the phone interface, it has to be done via a configuration file.
The following is an example of a configuration file to enable the EFK feature and also add the PARK soft key.
Note that the call park extension number used in this example is 700. Make sure you change this number to your own call park extension number.
<?xml version="1.0" encoding="UTF-8" standalone="yes"?>
<PHONE_CONFIG>
<ALL
feature.enhancedFeatureKeys.enabled="1"
softkey.1.enable="1"
softkey.1.label="Park"
softkey.1.use.active="1"
softkey.1.action="700$Tconsult$"
/>
</PHONE_CONFIG>
Create configuration file
Create the configuration file as shown in the above example.
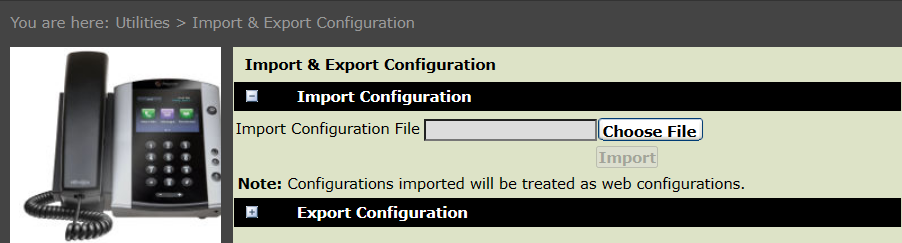
Import configuration file
Login to the phone's web interface and navigate to Utilities -> Import & Export Configuration.
Click Choose File and select the above file that was created and click Import.
A success message will be displayed.
Using the PARK softkey
While on an active call, the PARK softkey will be displayed.
To park the active call, press the PARK softkey, listen to the parking lot number announced, then press the TRANSFER softkey to complete the action.
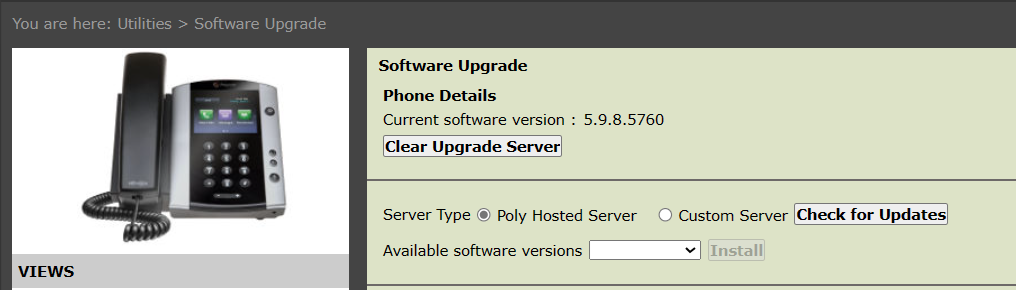
3. Software Upgrade
To update your software to the latest version:
- Go to Utilities -> Software Upgrade
- Click on Check for Updates
- If a newer version is available, click on Install.
- The phone will reboot.