

InfinityOne - Configuring UCX for InfinityOne
Table of Contents
STEP ONE: ICE support
STEP TWO: DTLS Certificate
STEP THREE: Define Port for Firewall
STEP TWO: DTLS Certificate
STEP THREE: Define Port for Firewall
STEP ONE: First Key Position
STEP TWO: Public IP Address
STEP THREE: Hotdesking and Set Based Configuration
STEP TWO: Public IP Address
STEP THREE: Hotdesking and Set Based Configuration
1. Enabling Softphone to make and receive calls
To allow the InfinityOne Softphone to make and receive calls, there are several settings that need to be configured on the UCX Server.
STEP ONE: Enable ICE support
- Open the UCX Web based configuration utility
- From the PBX tab, select PBX Configuration
- From the left side column, select Advanced Settings
-
Scroll down to the Media Settings section

-
Set ICE Support Enabled to True

-
Click on the green check icon
 to save the change
 -
Click on the green check icon to save the change
- Click on the Apply Config bar at the top to apply the changes


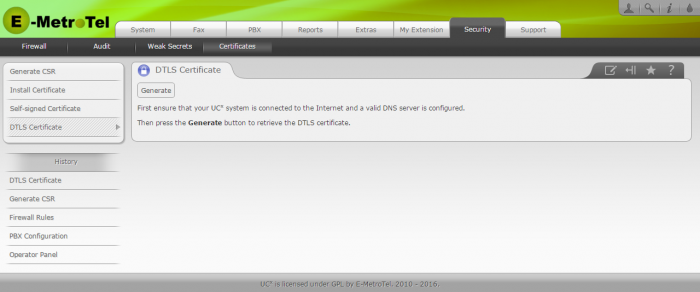
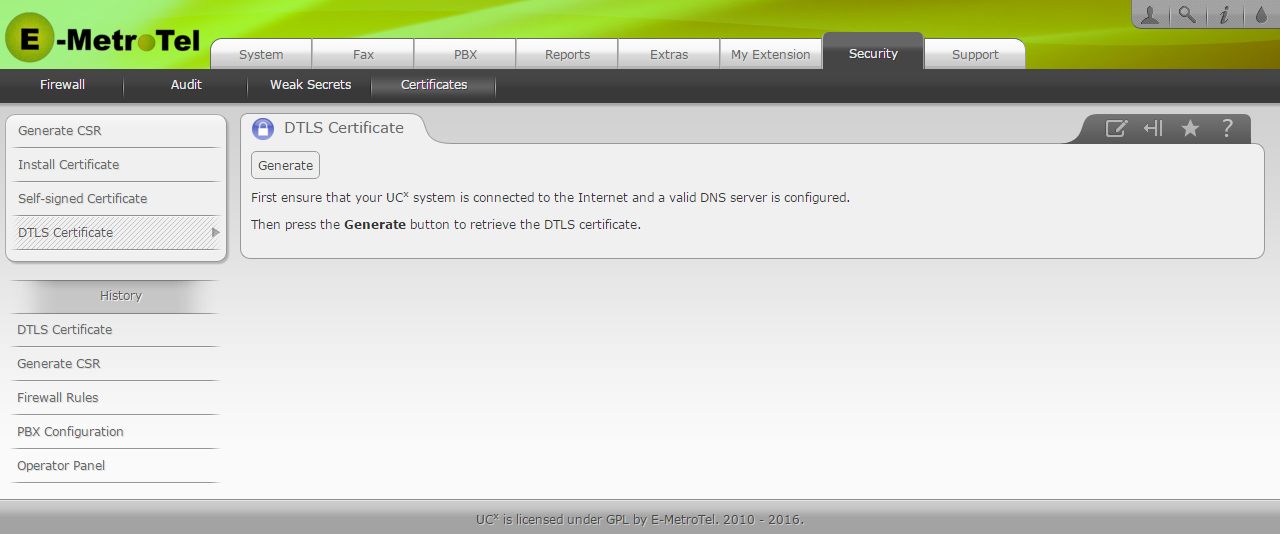
STEP TWO: Install DTLS Certificate
The DTLS Certificate is required to be generated before you can make and receive voice calls on your InfinityOne clients.
Before continuing with the steps below, ensure your UCX server is connected to the internet and a valid DNS server is configured. (See Network Parameters for details.) In order to use the InfinityOne Mobile application, you will be required to purchase and install an E-MetroTel SSL certificate as well.
- From the Security tab, select Certificates
-
From the left side column, select DTLS Certificate
-
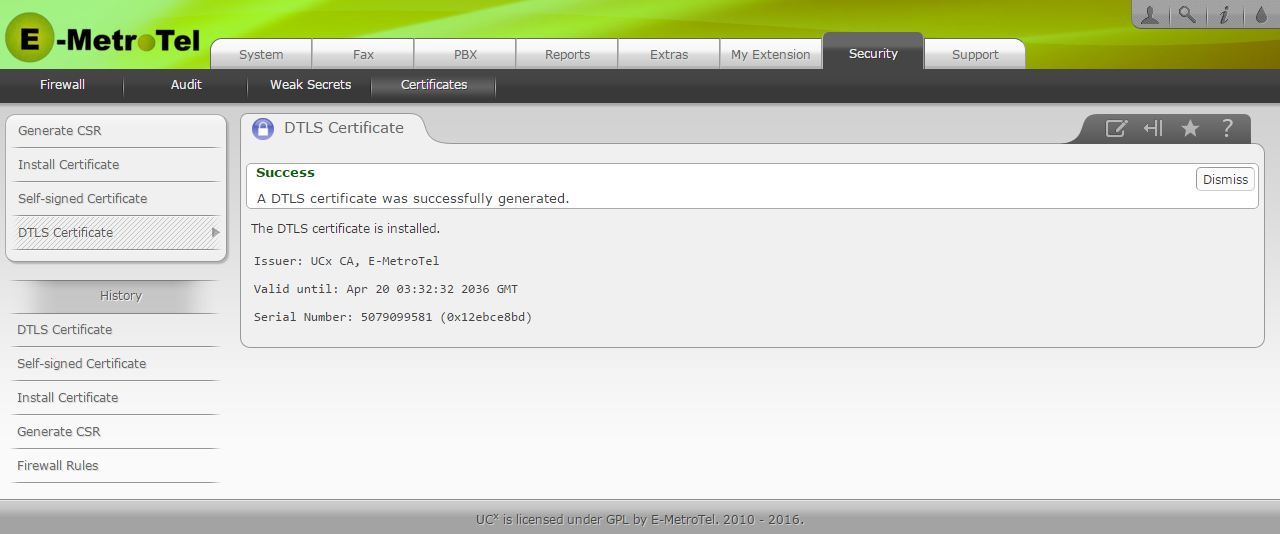
Press the Generate button to retrieve the certificate

- All InfinityOne Softphones connected to the UCX will now be allowed to make and receive calls.
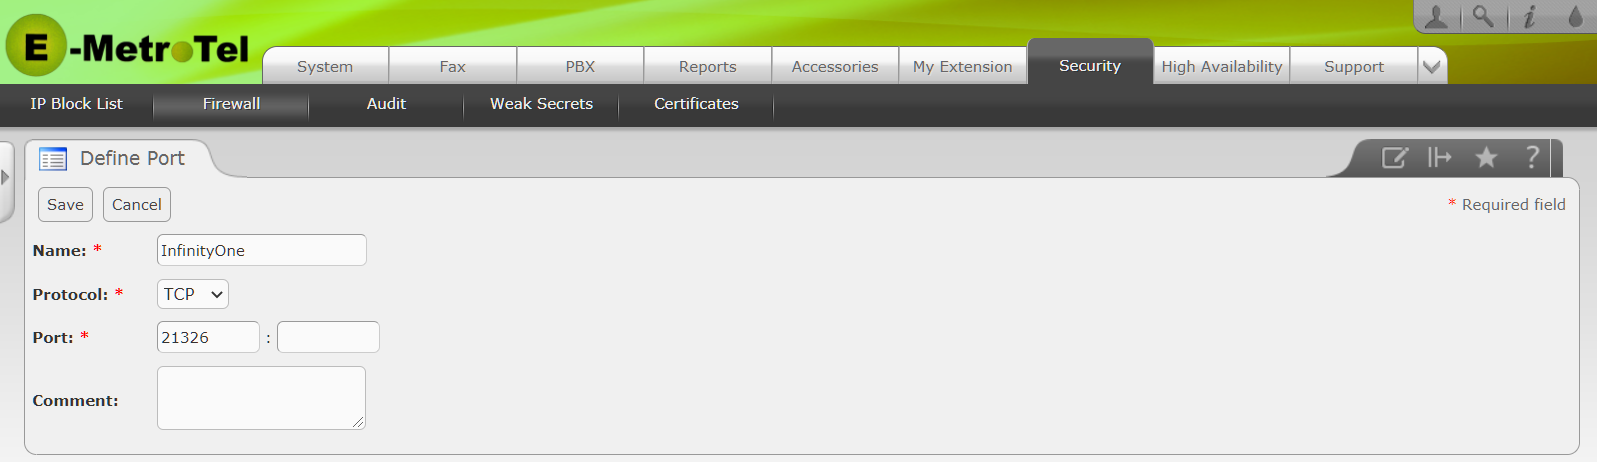
STEP THREE: Define Port for Firewall
If you are activating the UCX Firewall, then you need to define the port for InfinityOne. Otherwise you can skip this step.
- From the Security tab, select Firewall
- From the left side column, select Define Ports
- Press the Define Port button
- Enter a Name, select TCP for Protocol, enter Port 21326 (enter your own port number if not using the default 21326).
- Press the Save button to save the new definition
2. Enabling Softphone to Function Best
The following parameters are all configured via the UCX Web-based Configuration Utility, under PBX -> PBX Configuration -> XSTIM Settings.
STEP ONE: Verify First Key Position
InfinityOne softphones function best when the setting for First Key Position is set to the lower right corner of the display.
Scroll down the XSTIM Settings page, check the value for First Key Position. The highlighted button will indicate the current setting.
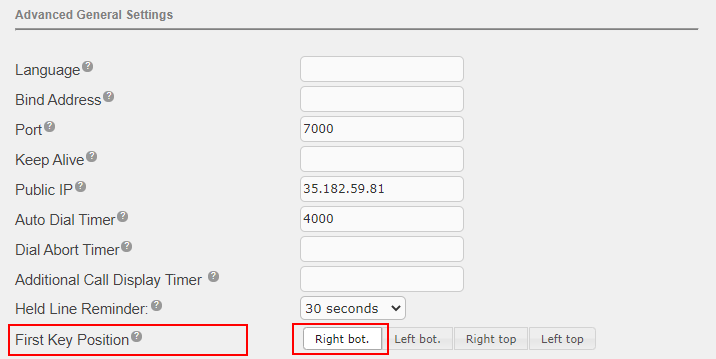
If a change of setting is required, click on the Right Bot. button, then click Submit Changes and Apply Config.
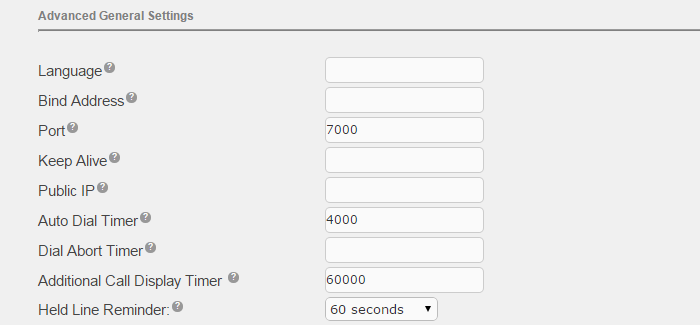
STEP TWO: Configure Public IP Address
To allow softphones located remotely to register to the UCX Server, ensure the Public IP is set.
On the XSTIM Settings page, ensure the external IP address of the UCX Server in configured in the Public IP field.
If a change is required, enter the value then click Submit Changes and Apply Config.
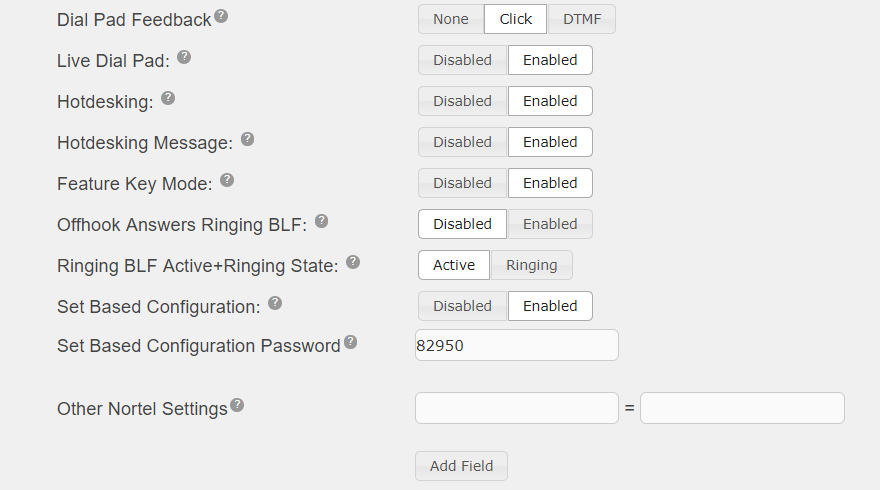
STEP THREE: Enable Hotdesking and Set Based Configuration
The Hotdesking and Set Based Configuration features are highly recommended for use with the InfinityOne softphone.
On the XSTIM Settings page, verify that Hotdesking and Set Based Configuration fields are set to Enabled.
If a change is required, click on the Enabled button, then click Submit Changes and Apply Config.
3. Configure SMTP Settings for Emails
Some internet service providers (ISPs) will block TCP Port 25 traffic on outbound connections which can impact the ability for the UCX and InfinityOne to send email messages.
The UCX software has a feature called Remote SMTP Delivery which allows the system administrator to change the port used for communication with a mail server. If your ISP blocks the TCP Port 25 traffic, refer to Remote SMTP for instructions on how to set up the connection to your email server before beginning to invite InfinityOne users via email.