Infinity 5006 Sip
Introduction
The Infinity 5006 IP Phone has 20 programmable buttons and is optimized for knowledge workers and contact center agents. Programmable buttons can be configured with UCx features like BLF, Auto-Dial, Intercom, Call Pickup, and many other features.
The 5006 features a high-resolution 320 x 240 pixels 2.8" TFT-LCD display and HD quality audio.

Packing List
- 5006 Phone
- Phone stand
- Handset and handset cord
- Ethernet cable
- Quick reference guide
Installation
STEP ONE: Attach the phone stand

STEP TWO: Connect the Handset and optional Headset

STEP THREE: Connect to the network and power
The Infinity 5006 phone is PoE enabled. The power adapter is extra and not included.

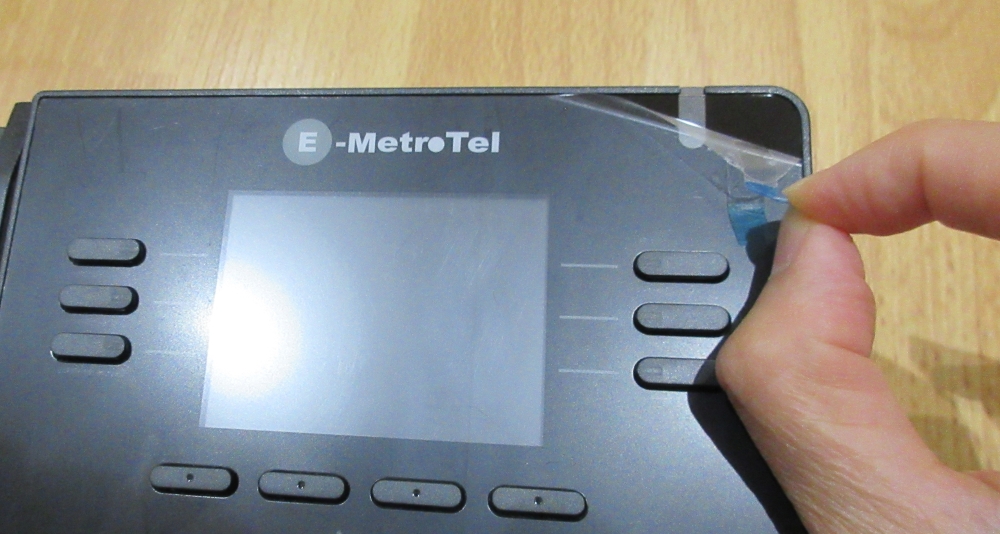
Step Four: Peel off Protective Film
Configuration
STEP ONE: Configure Extension on the UCx Server
- Login to the UCx Web-based Configuration Utility
- Navigate to PBX - PBX Configuration - Extensions page
-
Add an Extension for a Generic SIP Device with the following basic parameters:
- User Extension (e.g. 511)
- Display Name
- secret
- Click on Submit to create the extension
- Press the Apply Config bar at the top
STEP TWO: Obtain IP address of the 5006 phone
Connect the phone to a network that is setup for DHCP. After initialization is complete, perform the following steps to obtain the IP address assigned to the phone:
- From the phone, press the Menu key
- Use the arrow keys to navigate to Status then select it
- Select Information
- Take note of the IPV4 address (IP address of the phone)
STEP THREE: Configure Account on the 5006 phone
From a browser, enter the IP address of the 5006 phone (obtained from STEP TWO).
Login to the web interface using the admin account (default values are username admin and password admin).
Perform the following steps to register an account:
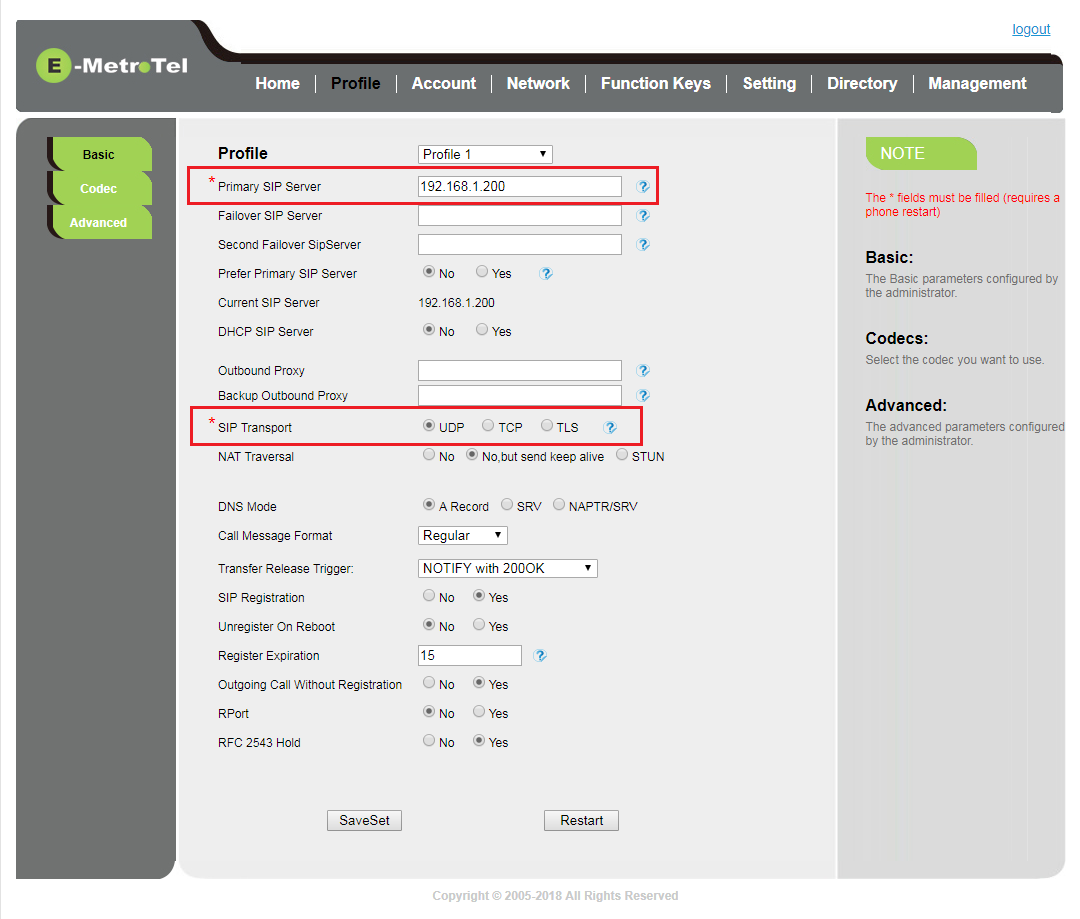
- Navigate to the Profile - Basic page.
- Enter the IP address of the UCx Server in the Primary SIP Server field, e.g. 192.168.1.200.
- Verify the SIP Transport is UDP.
-
Click on the SaveSet button at the bottom of the page.
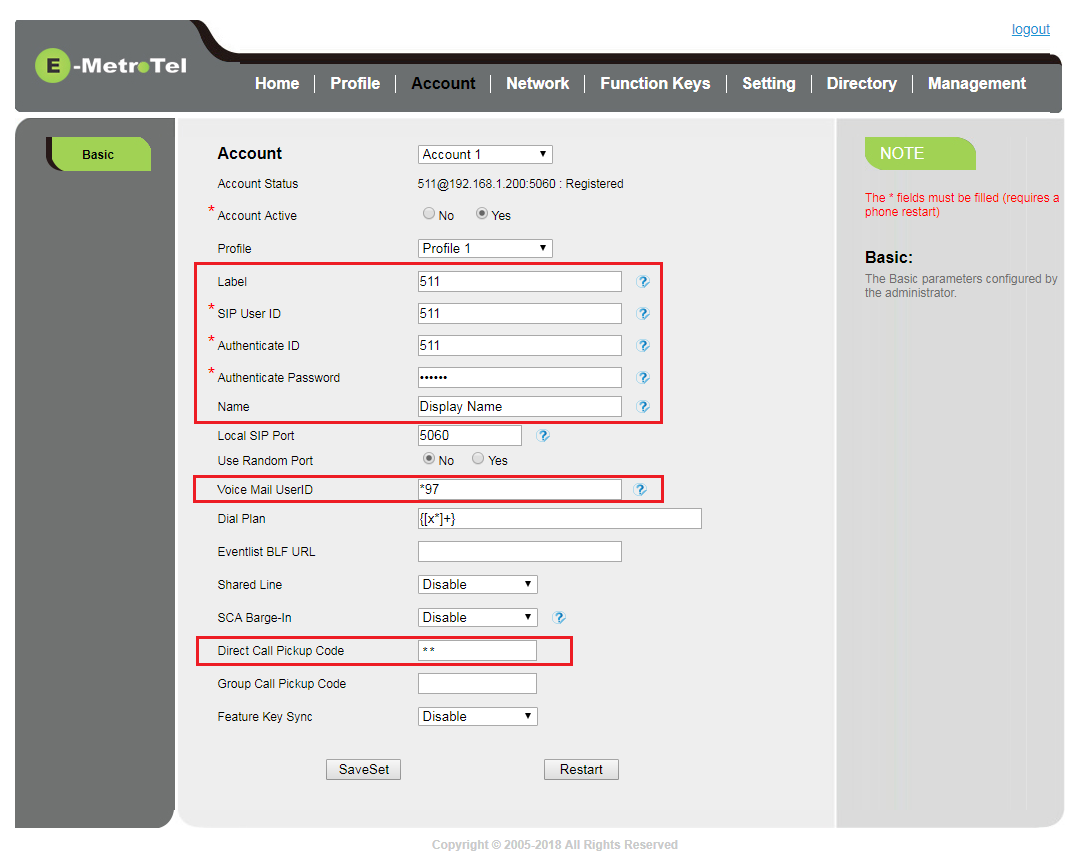
- Navigate to the Account - Basic page.
-
Populate the following fields:
- Label - A name for the account
- SIP User ID - User Extension (from STEP ONE)
- Authenticate ID - User Extension (from STEP ONE)
- Authenticate Password - Secret (from STEP ONE)
- Name - Display Name (from STEP ONE)
- Enter *97 in the Voice Mail UserID field. This will allow the phone to access the user's voicemail box by pressing the Message Waiting key.
- Enter ** in the Direct Call Pickup Code field to allow call pickup using the BLF key.
-
Click on the SaveSet button at the bottom of the page.