

FXS 16-port Card - System Menu
1.0 System Settings
1.1 System Status
On the System Status page, you will find Interface and Channels status, as well as SIP, IAX2, Routing, and Network information.
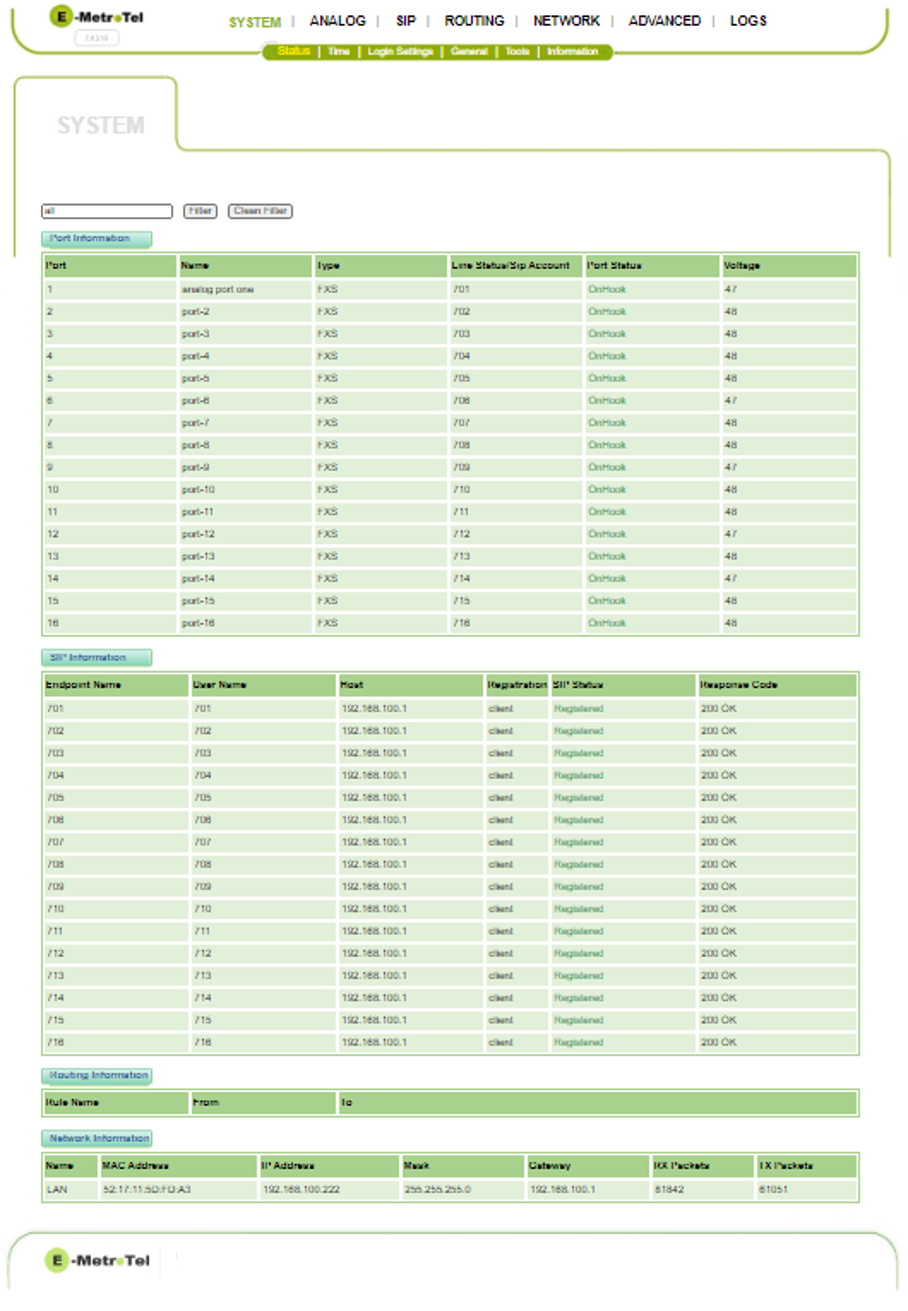
Description:
- Port Information: Shows the status of the port. including the logical Name you have defined for each port, the port type (always FXS), the SIP Account assigned to each port, the OnHook / OffHook status and the voltage present on the line.
- SIP Information: Shows the status of the individual SIP Endpoints
- Routing Information: Displays Rule Names
- Network Information:Provides the MAC Address, IP address / Subnet Mask / Gateway Address, and the TX / RX packets sent over this backplane interface.
1.2 Time
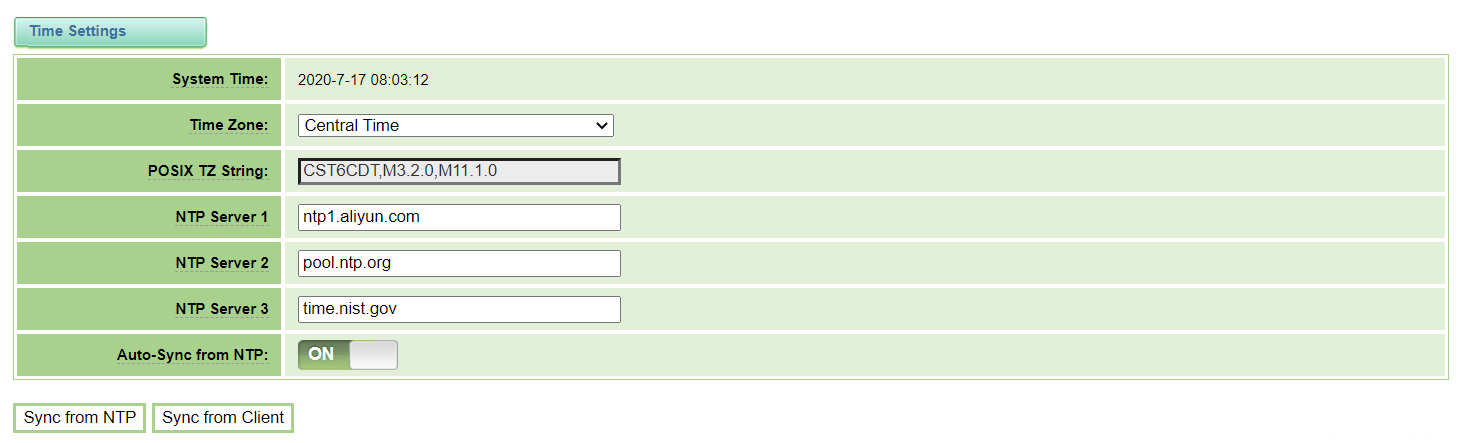
Description:
- System Time: Shows the current value of the System Time
- Time Zone: Choose the world time zone setting for your location
- POSIX TZ String: Shows the equivalent Posix timezone string
- NTP Server 1, 2, 3: Time Server domain or hostname
- Auto-Sync from NTP: Choose whether to enable or disable the automatic synchronization with the NTP server (On/Off)
- Sync from NTP: Click this button to force the system to synchronize with the designated NTP server
- Sync from Client: Click this button to synchronize the time from local machine
1.3 Login Settings
You may modify login parameters for web browser access and SSH access. You can also disable SSH access.
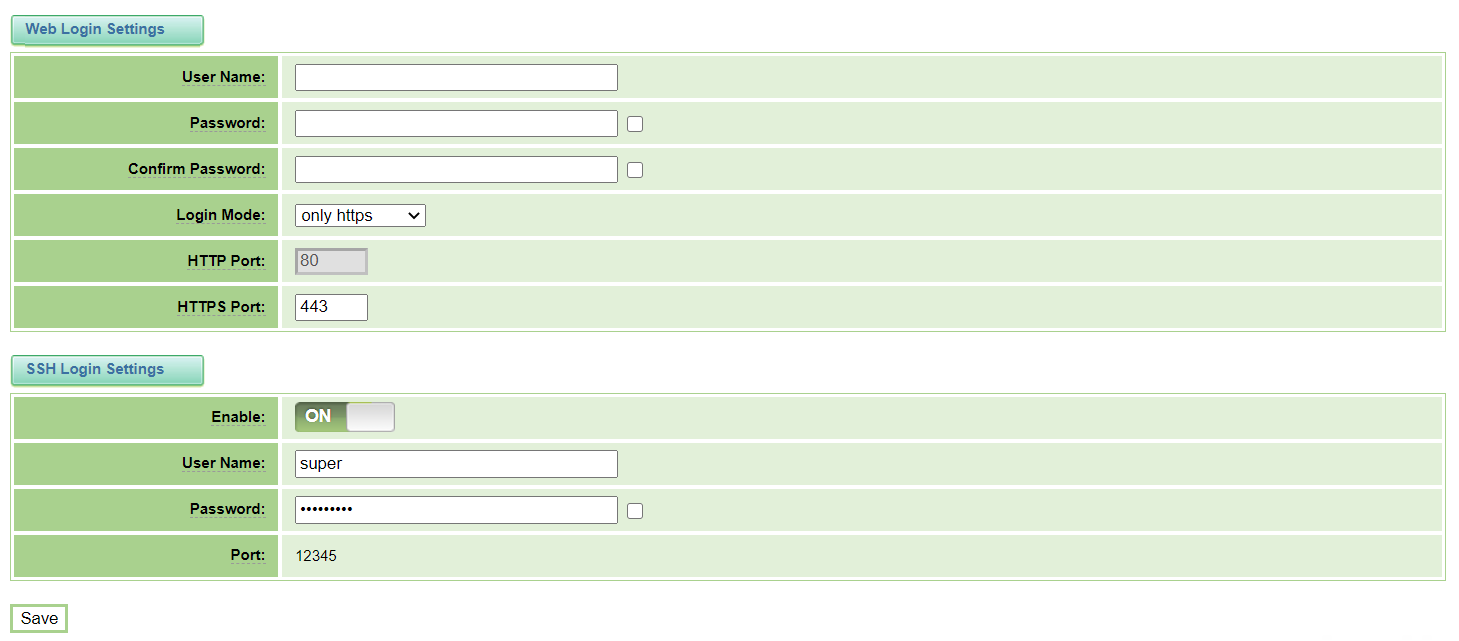
Description:
Web Login Settings:
- User Name: Defines the login user name to manage all aspects of the card. (Allowed characters “-_+<>&0-9a-zA-Z”; Length:1-32 characters.)
- Password: Changes the password value. (Allowed characters "-_+. <>&0-9a-zA-Z"; Length: 4-32 characters.)
- Confirm Password: Confirm the same password as 'Password' above.
- Login Mode: Specify the web login mode: http and https or only https. Default is http and https.
- HTTP Port: Hard coded to port 80.
- HTTPS Port: Specify the HTTPS port number (typically should be set to the standard 443).
- Save: Save the updated settings.
SSH Login Settings:
- Enable: Allow SSH connections (On / Off)
- User Name: Defines the login user name to manage all aspects of the card. (Allowed characters “-_+<>&0-9a-zA-Z”; Length:1-25 characters.)
- Password: Changes the password value. (Allowed characters "-_+. <>&0-9a-zA-Z"; Length: 4-32 characters.)
- Port: Hard coded to port 12345
1.4 General
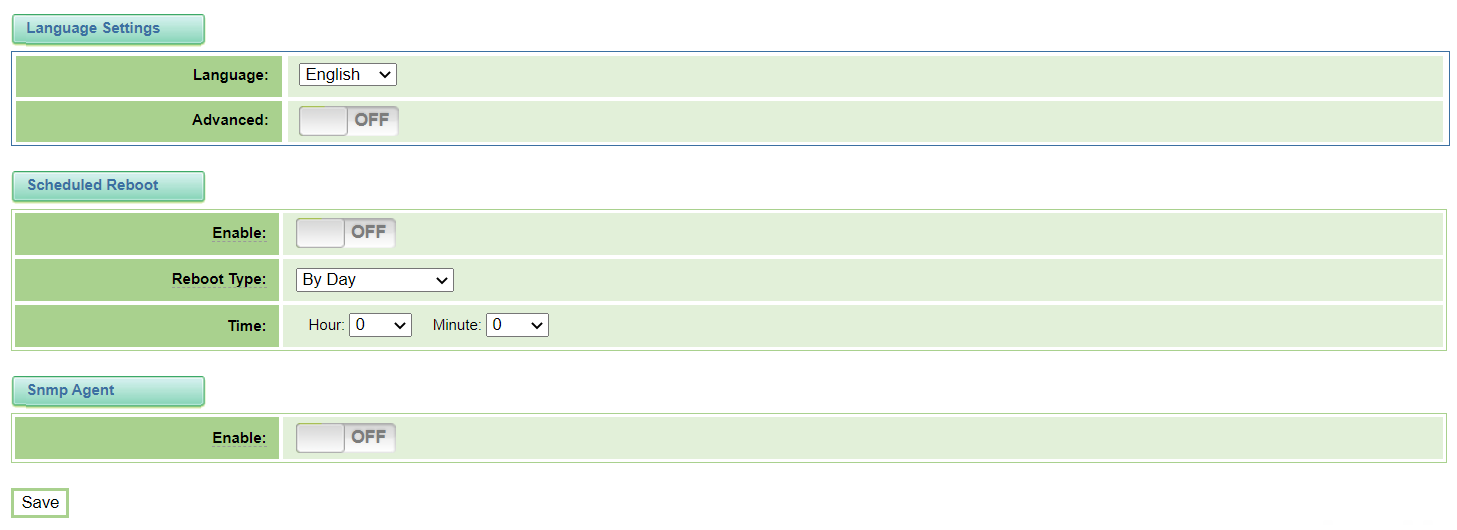
Language: The default language setting is English.
Scheduled Reboot:
- Enable: ON - enable or OFF - disable this function
- Reboot Type: By Day, By Week, By Month, or By Running Time
- Time: The time setting for when the scheduled Reboot will occur (values based on Reboot Type: Hour of Day, Day of Week, Day of Month, Number of Days and Hours)
- Save: Save the updated settings.
1.5 Tools
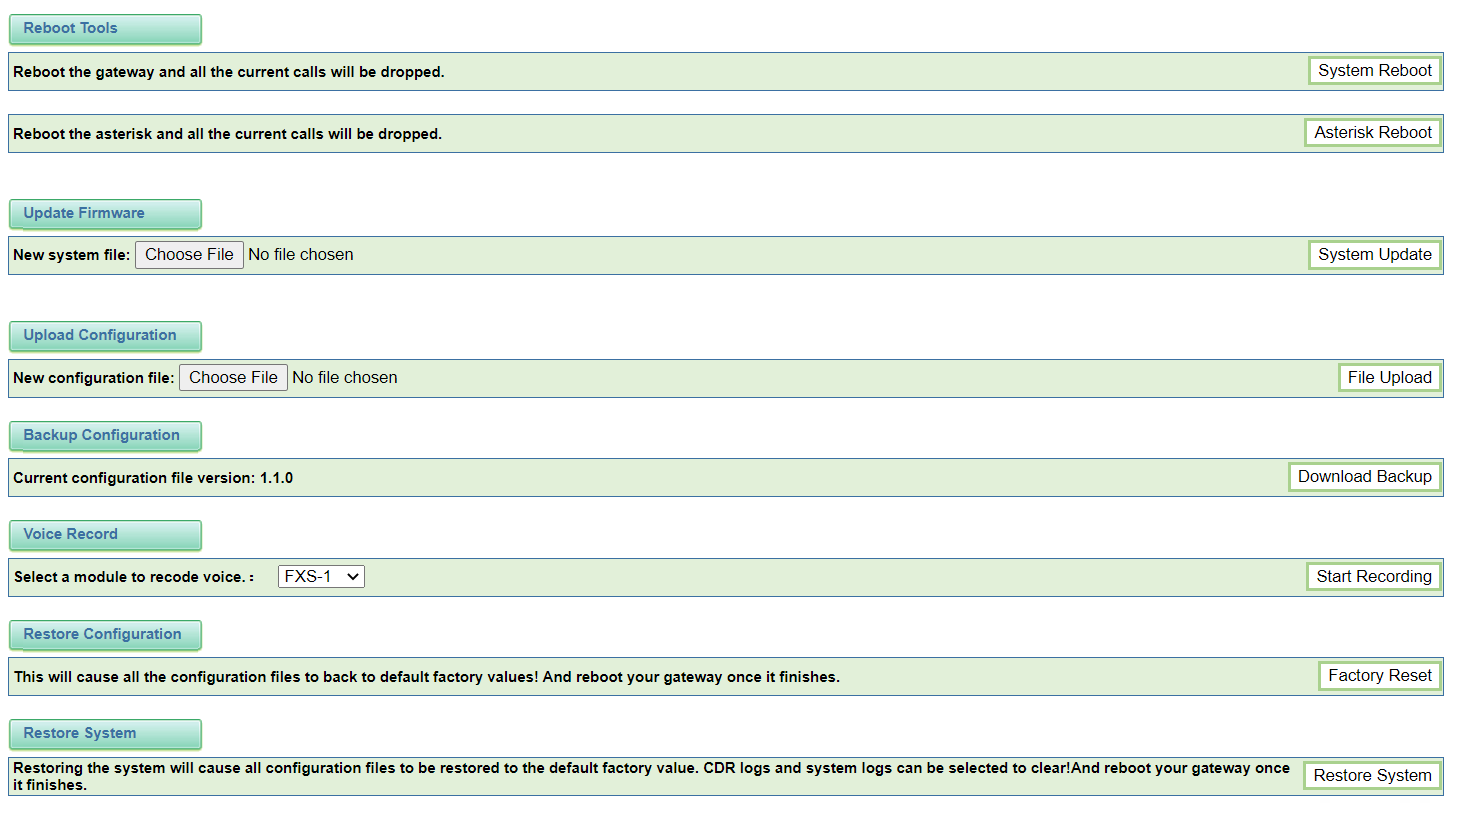
Reboot Tools:
Click the button representing the type of reboot you wish to perform; System Reboot or Asterisk Reboot. Click OK to confirm.
System Reboot: This will momentarily turn off the PRI-1 Card and turn it back on and will cause all calls to drop
Asterisk Reboot: Will restart the Asterisk component of the system, and will cause all calls to drop.
Asterisk Reboot: Will restart the Asterisk component of the system, and will cause all calls to drop.
Update Firmware:
Use this section to update the firmware on the FXS 16-port Card. This update should only be performed as advised by E-MetroTel support. Ensure that you create a Backup Configuration and download it prior to updating the firmware. Once you have completed the update, perform an additional Backup Configuration and download it to ensure the backup is compatible with the firmware update.
To perform the update:
- Navigate to the System / Tools menu
- In the Backup Configuration section, click on Download Backup and save the ".gz" file in a known location
- In the Update Firmware section, click on Choose File and select the ".bin" file provided by E-MetroTel support
- In the Update Firmware section, click on File Upload to begin the update process
- Wait for at least 3 minutes
- Log back into the FXS 16-port Card and return to the System / Tools menu
- Create a new backup configuration using the upgraded firmware by clicking on the Download Backup button again
Upload Configuration:
To restore the system configuration files to a previously saved backup file, choose the file you want to restore from and choose File Upload.
Backup Configuration:
Click the the Download Backup to create and download a backup of your current configuration.
Voice Record;
When you are troubleshooting voice quality issues, select a channel on the FXS 16-port Card that you are troubleshooting and then click Start Recording. The system will notify you the maximum recording time. When done, the system will prompt you to rename and save a "tar.gz" file on your PC.
Restore Configuration:
Click Restore Configuration to reset the configuration files back to factory default values and reboot the system.
Restore System:
Click Restore System to reset the configuration files back to factory default values and provide the option to also clear CDR and system logs, and then reboot the system.
1.7 Information
The Information page provides details of the model name, software and hardware versions, the slot number of the Galaxy Expand it is located in, storage and memory utilization, and kernal build date. It also provides system up-time and the current system time.

Verify that the Software Version is at least the same level as available on the Dowload Software Update page on the E-MetroTel Partner Portal. If it is not, then download the latest software version and install it as described in FXS 16-port Card - Updating Firmware.