Thank you for purchasing the E-MetroTel appliance with UCX software. The UCX appliance provides software-based PBX interworking with XStim, UniStim, and SIP phones, offering a complete Unified Communications set of capabilities as well as legacy investment protection to existing Nortel and Avaya deployments while providing a seamless evolution to a rich call service environment.
This quick start guide provides you with the information needed to install the UCX out-of-the-box, configure it to a running state and configure phones to perform a call using UCX. For more configuration details please see the pages under UCX Server.
The UCX20 is shipped with a single Network Interface Card (NIC).
The network port on UCX20 by default uses the static IP address 192.168.1.200, with netmask 255.255.255.0 and gateway192.168.1.1.
If the default network configuration is compatible with your local area network, connect the Ethernet connector of the UCX system to your network with a Cat 5 Ethernet cable, configure your PC's network adaptor to use the 192.168.1.xxx subnet, power up the UCX system and wait approximately 100 seconds for the UCX system to boot. For connection using Gigabit Ethernet we recommend a Cat 5E or Cat 6 cable!
If the default network configuration is not compatible with your local area network, you may connect the UCX directly to a PC with a statically configured IP address from the 192.168.1.xxx subnet using a Cat 5 Ethernet cable (either straight through or cross over), power up the UCX system and follow the instructions for Changing the UCX Network Configuration.
The UCX Server is shipped with two Network Interface Cards (NICs).
The Ethernet ports are labeled T-LAN and C-LAN.
The C-LAN port on UCX systems by default uses the static IP address 192.168.1.200, with netmask 255.255.255.0 and gateway 192.168.1.1.
The T-LAN port on UCX by default uses the static IP address 192.168.10.200.
If the default C-LAN configuration is compatible with your local area network, connect the C-LAN Ethernet connector of the UCX to your network with a Cat 5 Ethernet cable, configure your PC's network adaptor to use the 192.168.1.xxx subnet, power up the UCX and wait approximately 100 seconds for the UCX Server to boot. For connection using Gigabit Ethernet we recommend a Cat 5E or Cat 6 cable!
If the default CLAN configuration is not compatible with your local area network, you may connect the UCX directly to a PC with a statically configured IP address from the 192.168.1.xxx subnet using a Cat 5 Ethernet cable (either straight through or cross over), power up the UCX Server and follow the instructions for Changing the Network Configuration.
The Galaxy Mini and Galaxy 250 devices are shipped with two Ethernet network interfaces, labeled "LAN" and "WAN". The WAN network port by default uses the static IP address 192.168.1.200, with netmask 255.255.255.0 and gateway192.168.1.1, and is configured as Ethernet 0 in the Web-based Configuration utility. The LAN interface is default as static and is 192.168.10.200, and is configured as Ethernet 1.
If the default network configuration is compatible with your local area network, connect the WAN Ethernet connector of the system to your network with a Cat 5 Ethernet cable, configure your PC's network adaptor to use the 192.168.1.xxx subnet, power up the Galaxy Mini system and wait approximately 60 seconds for the system to boot. For connection using Gigabit Ethernet we recommend a Cat 5E or Cat 6 cable!
If the default network configuration is not compatible with your local area network, you may connect the Galaxy system directly to a PC with a statically configured IP address from the 192.168.1.xxx subnet using a Cat 5 Ethernet cable (either straight through or cross over), power up the Galaxy Mini system and follow the instructions for Changing the Network Configuration.
The Galaxy Expand configuration with the 2930 Processor Card has two IP addresses, one configured to access via the front panel (labeled ETH) and the second one connecting through the Galaxy Expand backplane and reachable by connecting to either of the switch ports on the SFS (Switch Fabric Card) labeled ETH1 or ETH2.
The network interface connection on the Galaxy Expand backplane, referenced as Ethernet 0 in the UCX software, by default uses the static IP address 192.168.1.200, with netmask 255.255.255.0 and gateway 192.168.1.1 The ETH connection on the front of the 2930 card uses the static IP address 192.168.10.200, and is referenced as Ethernet 1 in the UCX software.
The Galaxy Expand configuration with the i5 Processor Card has three IP addresses, two configured to access via the front panel (labeled WAN and LAN) and the third one connecting through the Galaxy Expand backplane and reachable by connecting to either of the switch ports on the SFS (Switch Fabric Card) labeled ETH1 or ETH2.
The connection on the front of the labeled WAN, referenced as Ethernet 0 in the UCX software, by default uses the static IP address 192.168.1.200, with netmask 255.255.255.0 and gateway 192.168.1.1. The other connection on the front of the i5 Process card is labeled LAN and has a static IP address of 192.168.10.200, and is referenced as Ethernet 1 in the UCX software. The network interface connection on the Galaxy Expand backplane, referenced as Ethernet 2 in the UCX software 192.168.11.200.
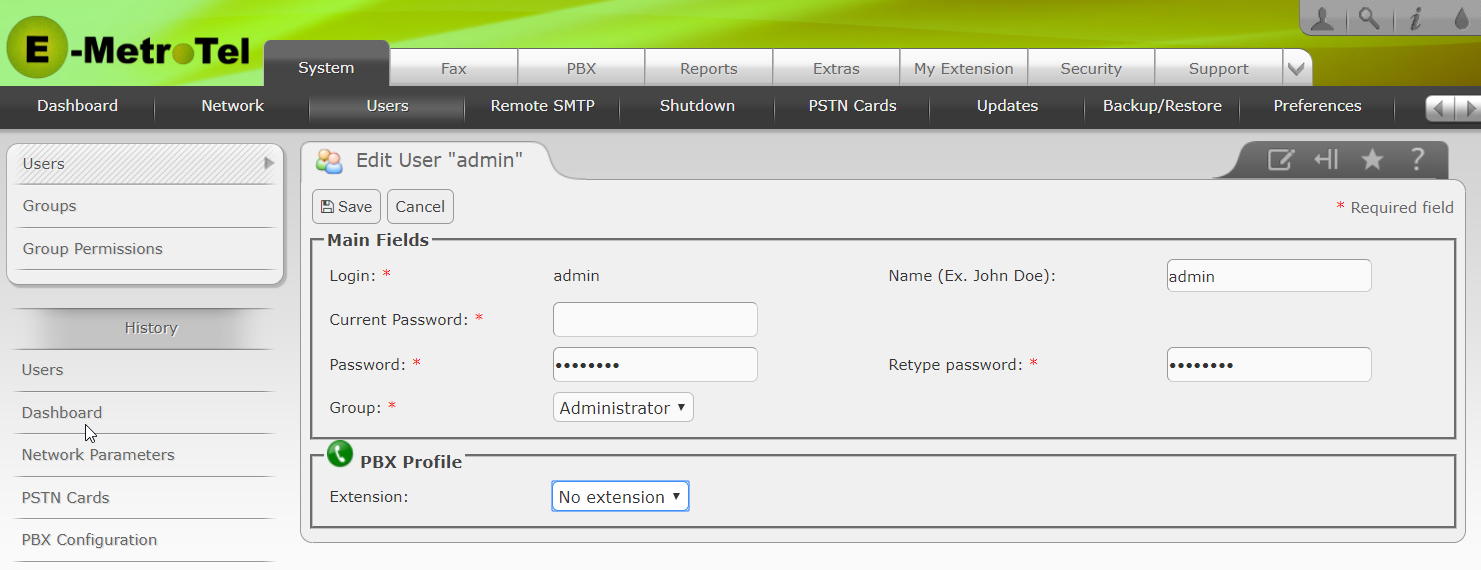
To prevent unauthorized access to the management interface of your UCX system you should change the default management password as the very first step in the initial configuration of the system.
To change the management password of your UCX system, perform the following steps:
To use the UCX system on your LAN, you have to set its network configuration to match your network. You should update some or all of the following properties:
To access the network parameters for your UCX system, perform the following steps:
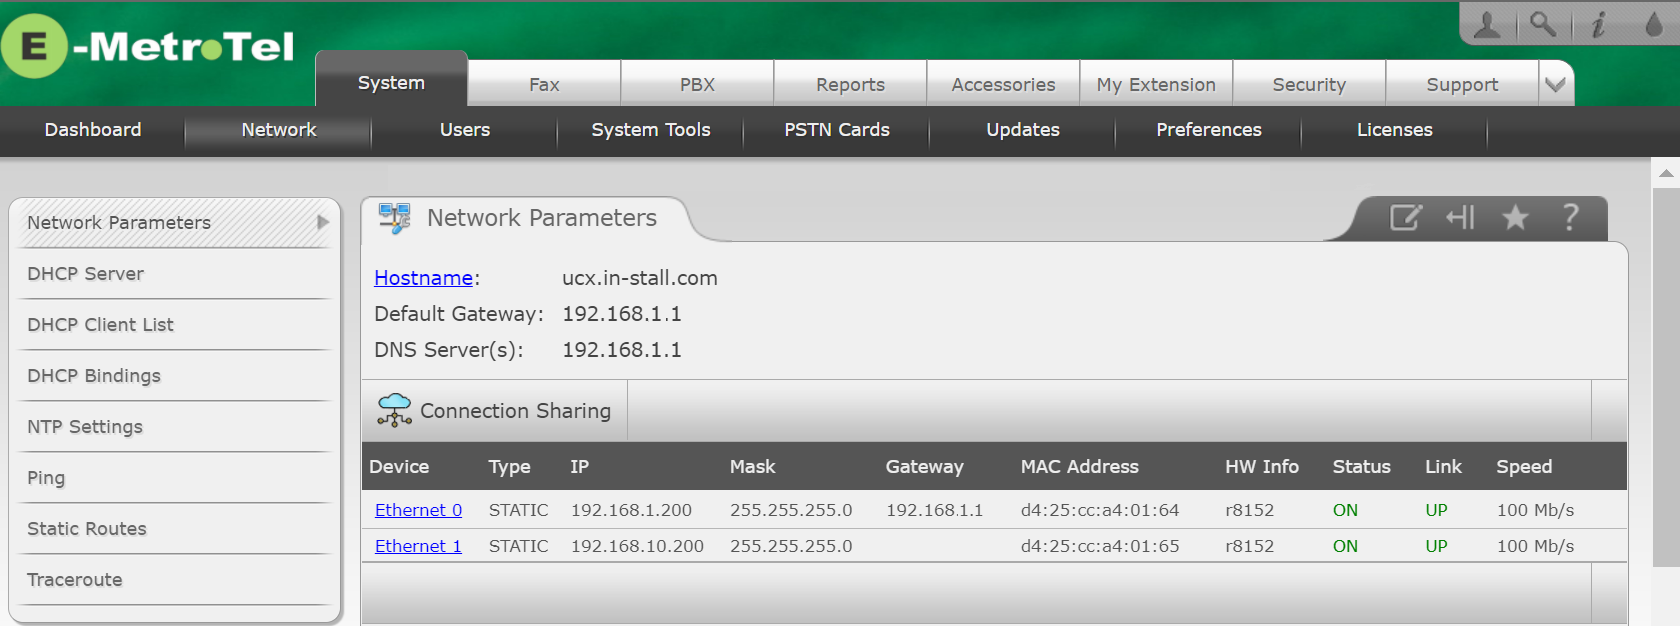
To change the host name, perform the following steps:
Enter a fully qualified domain name for the UCX system (e.g., UCX50.emetrotel.org - or UCX50.localhost if you do not want to use a fully qualified domain name for the system)

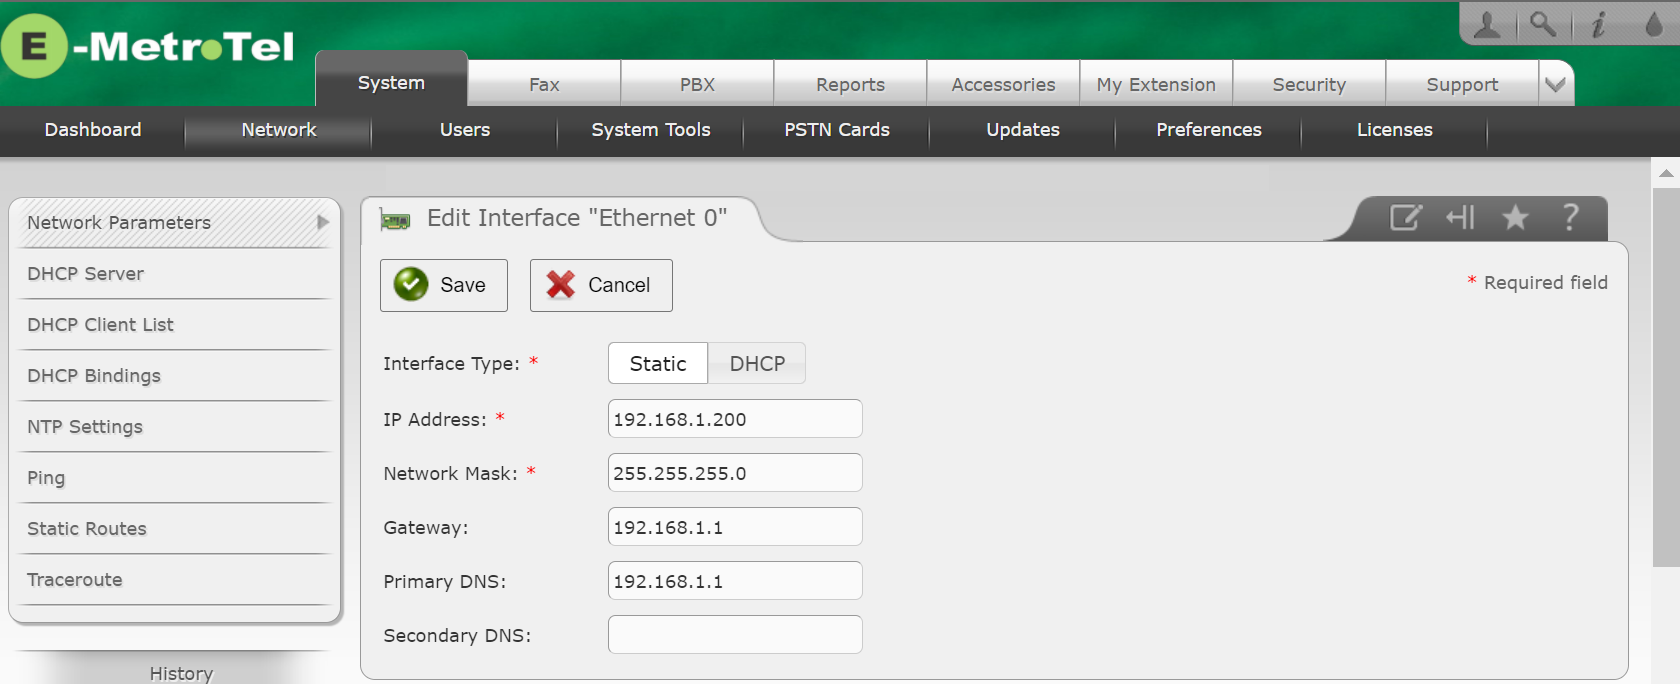
To change the IP address and subnet mask of your UCX system to match the customer network, perform the following steps:
If the Interface Type is Static. You have to specify the IP address, the Network Mask (subnet mask) and optionally the Gateway address.
You can set the Secondary DNS field to your preferred secondary DNS server or you can use the public DNS server 8.8.8.8 as the secondary DNS server.
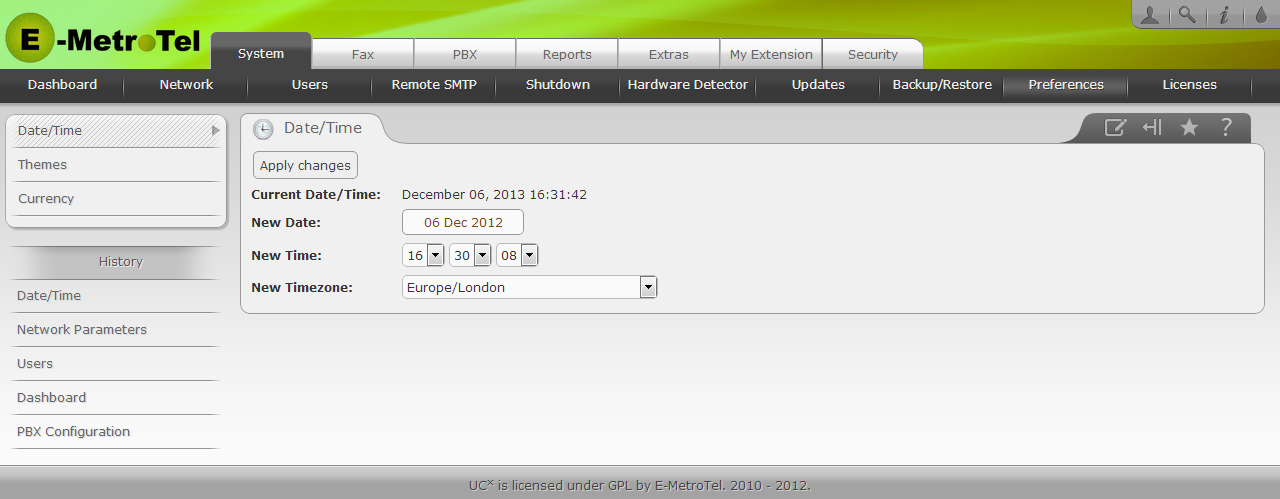
The date, time and time zone configured on your UCX server is used for several features:
If the system is connected to the internet and using Network Time Protocol (NTP) to keep the system time accurate, you only have to configure the correct time zone. If not using NTP or not connected to the internet, then make sure the date, time and time zone are set correctly.
To set the date, time and time zone, perform the following steps:
The Remote Access feature allows the Reseller and E-MetroTel to remotely connect to the Galaxy Mini (and/or other UCX software-based devices).
Successfully completing this step will verify that your Remote Access credentials are valid.
The Software Update will ensure that the system has the latest software updates, including any associated with the Activation process itself to be installed and running on the system.
Successfully completing this step will ensure that the network configuration is correct and the that there is a valid DNS server configuration as well.
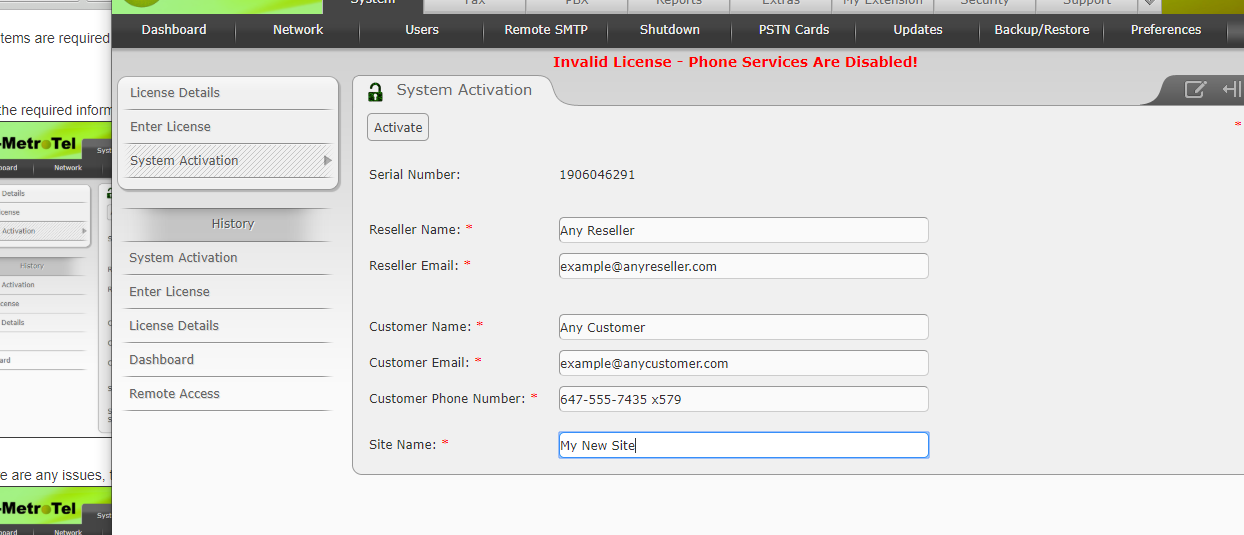
The reseller must submit the following to E-MetroTel:
E-MetroTel will take 24-hours to upload the Reseller information in their systems.
Once the main system activation is complete, the reseller must wait for all Child serial numbers to be assigned before retrieving the definitive and permanent license for the system.
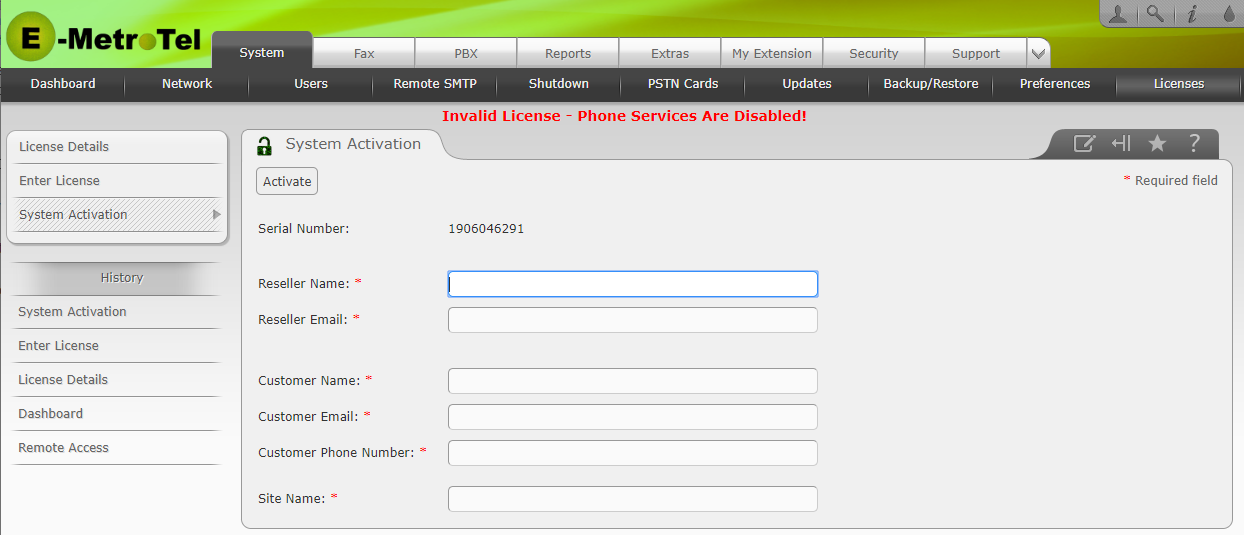
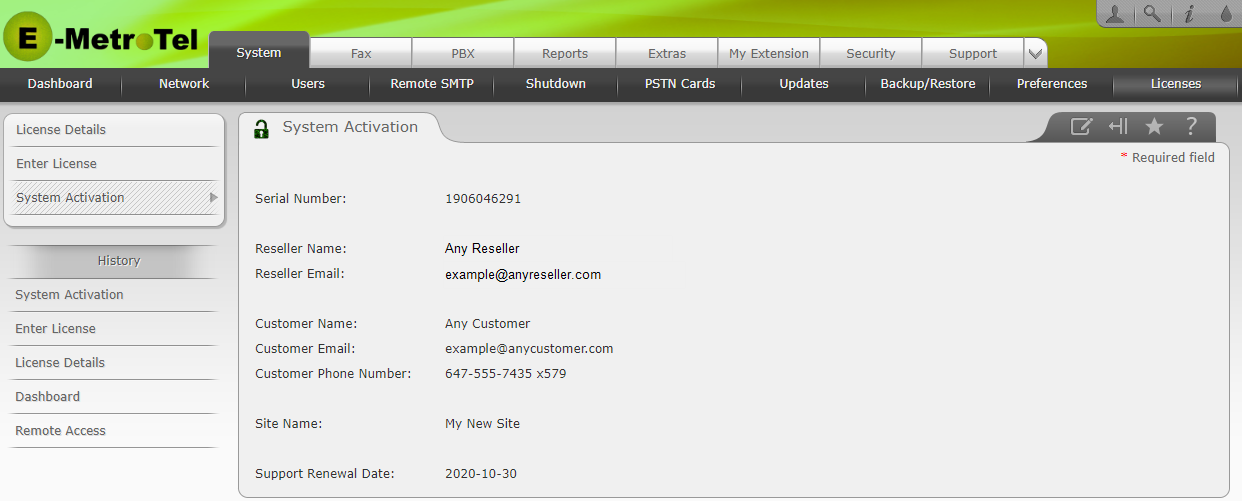
(Note: this field is only empty if the unit is still in "In Stock" status on the E-MetroTel Serial Number Management system. The Reseller Name will be pre-populated on the form if the unit has been moved to "Sold To" status on the E-MetroTel Serial Number Management system.)
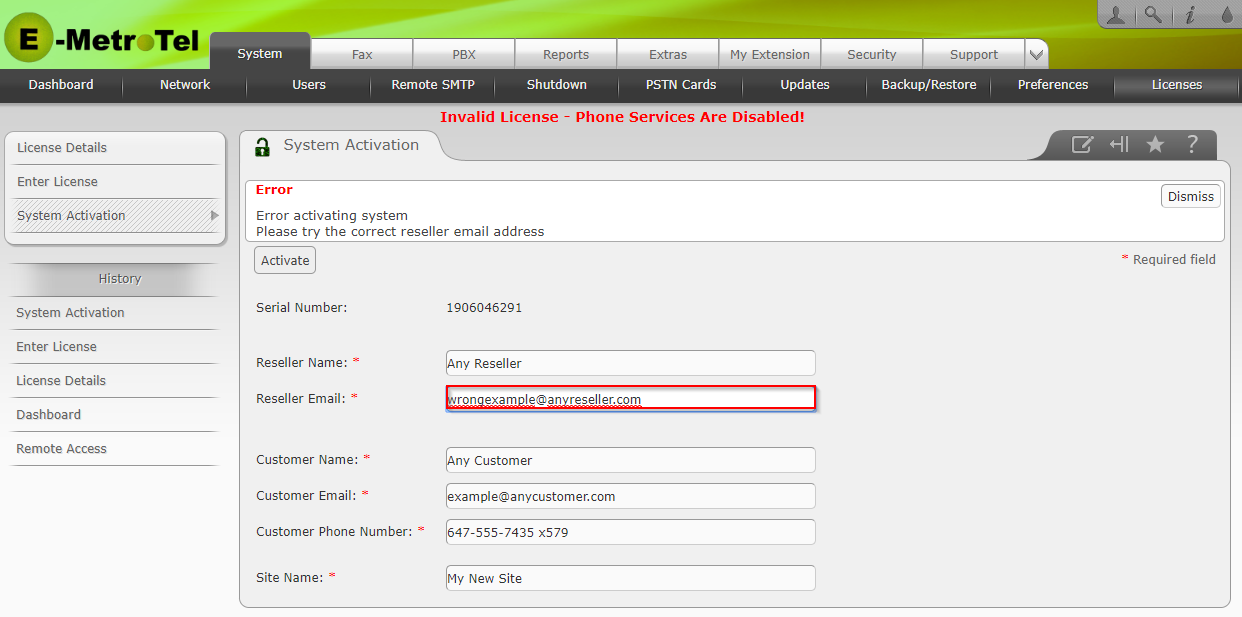
All of these items are required to be entered before the system can be activated, but the only items verified for accuracy are the Reseller Name (if not pre-filled) and Reseller Email. The Customer information allows both the reseller and E-MetroTel to more readily identify particular systems.
This section provides instructions how to create extensions. The Galaxy Mini does not need licenses for Infinity 5xxx Series XStim IP phones, Nortel digital phones, or analog phones, so once the following programming is completed on at least two extensions, a quick test call is performed to ensure the quick installation is completed successfully. Both the Infinity 5xxx Series XStim IP phones and Nortel digital phone types use the same configuration procedures for configuring extensions, although the Infinity 5xxx series sets connect to the Galaxy Mini via an IP connection while the Nortel digital phones must connect via a Digital Station interface device. This includes the E-MetroTel Digital Station Module - 16 port (DSM16) and Digital Gateway (DG) devices. Analog phones can connect to either the built-in RJ-11 jacks of the Galaxy (depending on the hardware configuration) or to analog ports on the Digital Gateway (DG) device if used.
Infinity 5xxx Series XStim phones connect to the UCX using either a Standard or Universal license (refer to the Extension licensing table in Product Licensing). They connect via either the customer LAN or via a dedicated IP Telephony LAN.
XStim based digital phones connect to the UCX software using either Basic, Standard, or Universal licenses. Note that the Galaxy Mini licensing includes 32 basic extension license so no additional licesnes are required unless you are expanding from 32 extensions to 64. They connect via the 16 port Digital Station Module (DSM16p).
Analog phones connect to the UCX using Basic, Standard, or Universal licenses. On a Galaxy Mini or Galaxy 250, they may connect using internal Dahdi-based cards when at least one FXS daughter card has been installed in the chassis, or they can connect to any system using the FXS interfaces on Galaxy FXS16, FXS8, or FXS/FXO combo cards that plug into the Galaxy Express and/or Galaxy Expeand chassis.
Dial from one extension to another, answer the call and verify that speech path is working in both directions.