The InfinityOne Queue Reports application is an extension of the UCX Call Center Reporting application. It publishes on-going reports on the call center operation, filtered by queue(s), agent(s) and date/time periods via the InfinityOne channel(s). Users can join or leave the queue reporting channels similar to other regular channels. The most important feature is the capability to send the reports via email.
The reports that are displayed by Queue Reports include:
The InfinityOne Queue Reports application is included as part of InfinityOne. It is a licensed feature and is available for unlimited use within the InfinityOne application once the license is installed on the UCX Server. You may use either the InfinityOne Desktop or Browser interface to view the Queue Reports; it is not supported on the Mobile interface.
Upgrade your UCX server to the latest software version. (See Software Update for details on how to upgrade your software.)
There should be one or more queues configured with one or more agents belonging to each of the queues. (See Call Center documentation for detailed instructions.)
The InfinityOne package must be installed on the UCX Server. (See InfinityOne - Install the infinity_one Package on UCX for detailed instructions.)
The InfinityOne Queue Reports application requires a license with access to the application. First obtain the license and then install the license key.
Request for a new license that includes the Queue Reports application.
Once the new license is ready, follow instructions License Retrieval to update the license.
If Queue Reports is already installed on the system, you can skip to the next step.
Otherwise, go to UCX Call Center Reporting Guide and follow the instructions to install Queue Reports.
If InfinityOne is already installed on the system, you can skip to the next step.
Otherwise, go to InfinityOne - Installation & Configuration Checklist and follow the instructions to install and configure InfinityOne.
The first time you configure Queue Reports, you must log in to the InfinityOne client (desktop or web) as an Administrator.
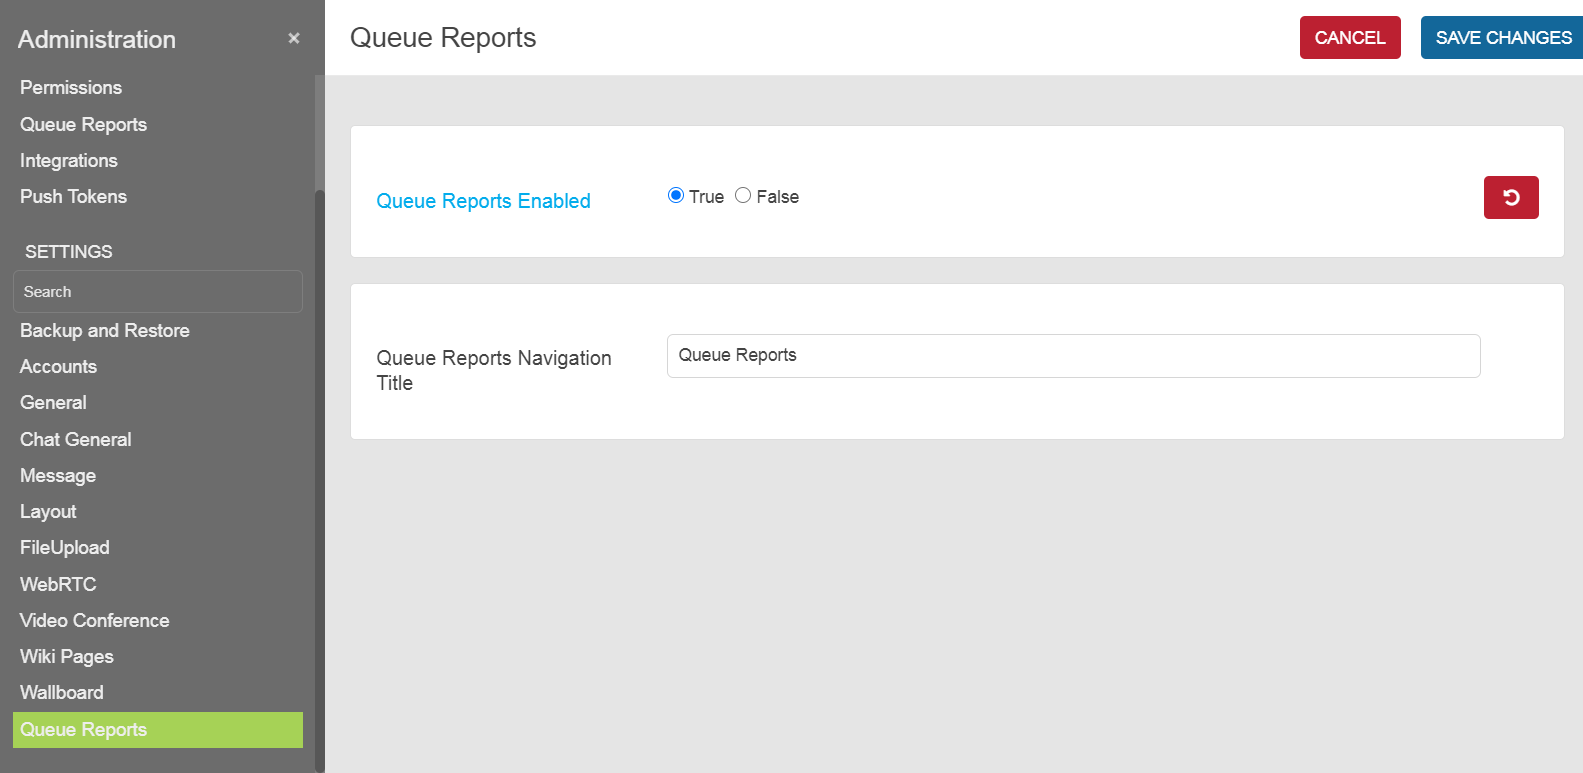
By default, only accounts with Administrator access can make changes to the Queue Reports settings:
Once Queue Reports has been enabled by the administrator account, any user that has been authorized to access Queue Reports will have to log out of their InfinityOne account and log back in to access the reports.
There are several pre-configured roles that have access to the Queue Reports.
The following table shows the permissions granted by default to the different roles.
| Permission/Role | Description | Administrator | QR User | QR |
|---|---|---|---|---|
|
View Queue Reports [view-qr] |
Can view report channels. | Yes | Yes | Yes |
|
Create Queue Reports [create-qr] |
Can create reports and view configuration of all reports | Yes | Yes | |
|
View Queue Reports Administration [view-queue-reports-administration] |
Can update Queue Report settings. | Yes |
The ability to edit reports is granted to users that are owners or moderators of the underlying channel, a capability that can be assigned to the user from the members list as it is for regular channels.
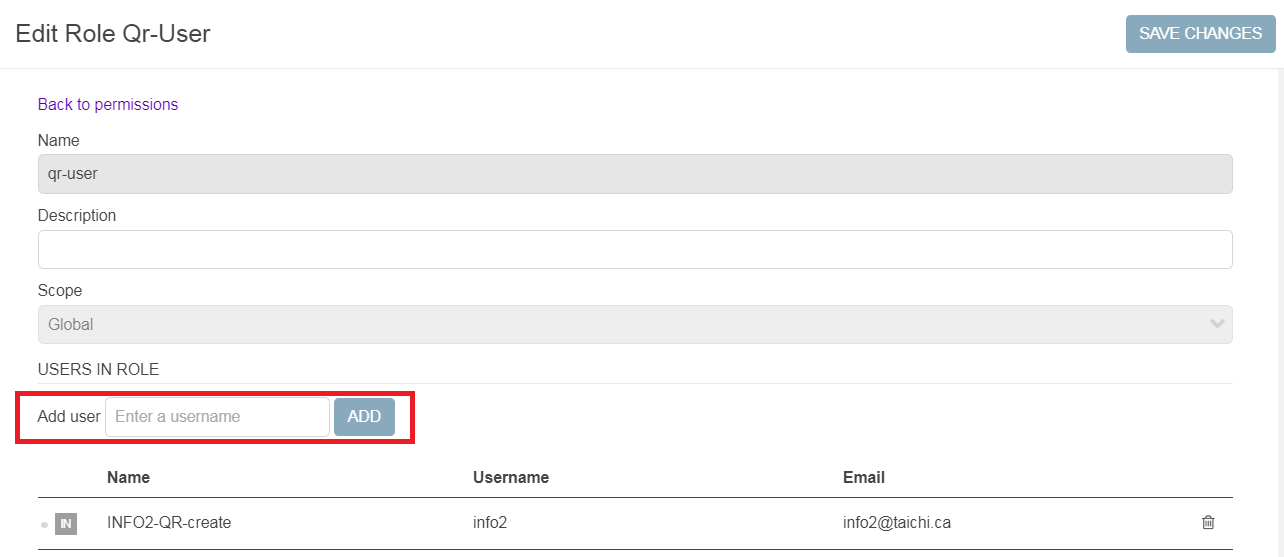
You can also set up specific accounts that only have access to the queue reports and no other features, or you can allow any or all of the other roles to view the queue reports.
To allow individual accounts with access to Queue Reports:

Typically, if this option were used, it would be used to provide every account with a standard User role the option of viewing queue reports.
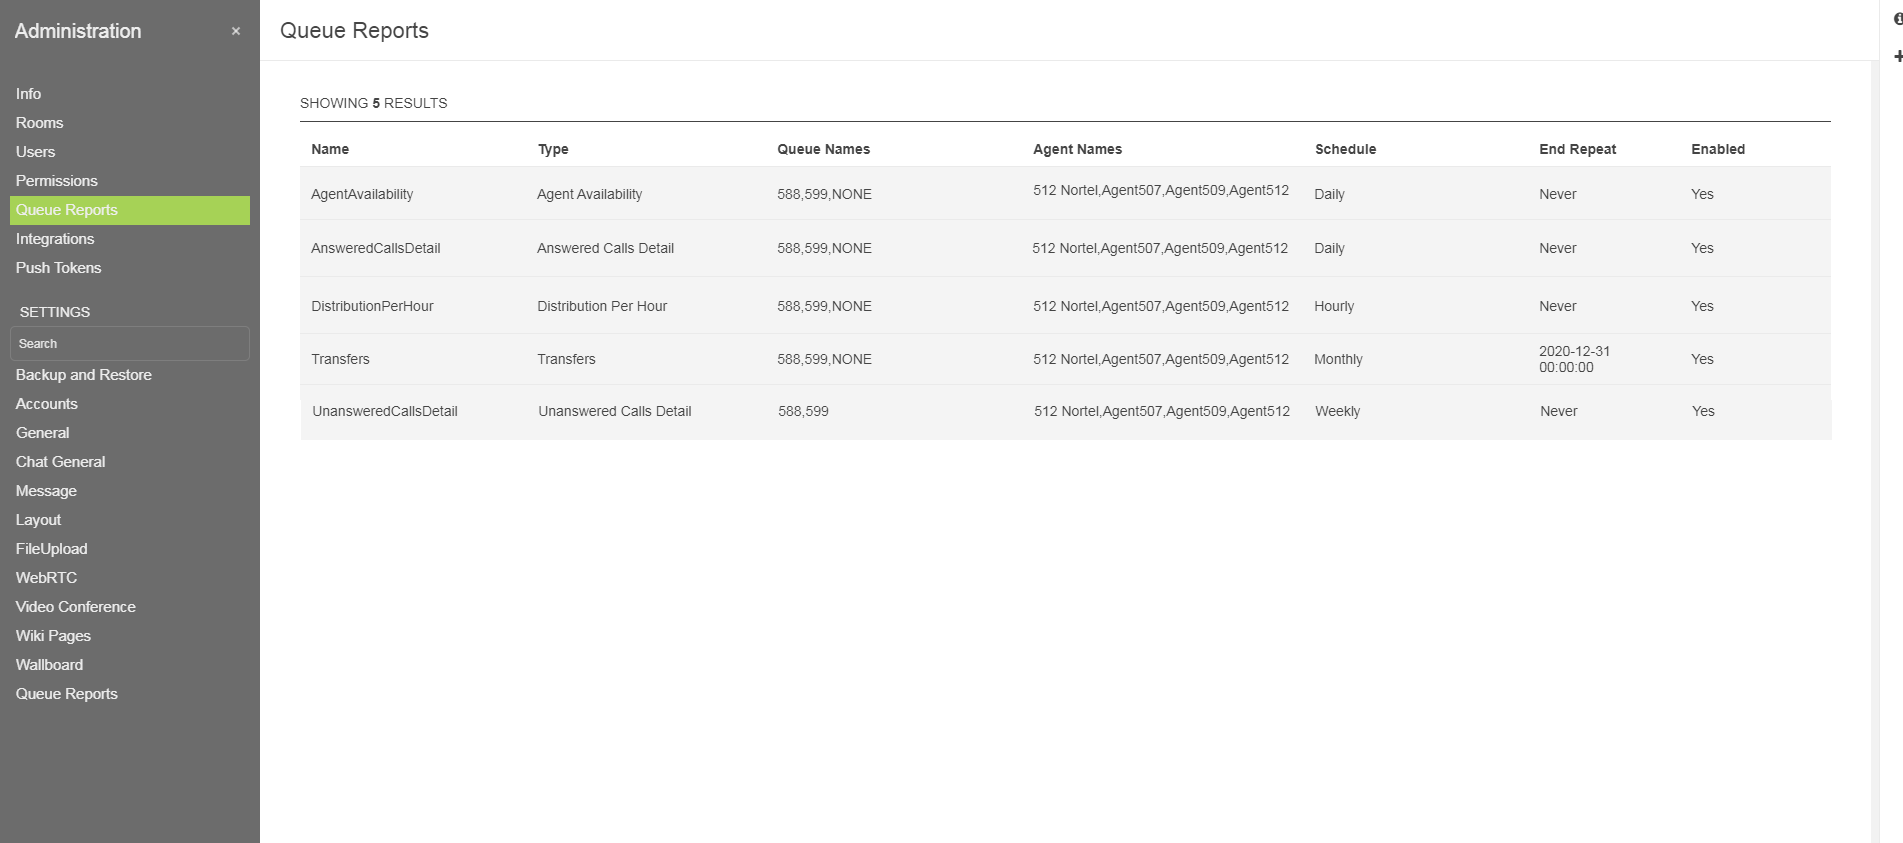
Login as an Administrator or use an account with access to queue reports.
 on the top right corner to ADD a report
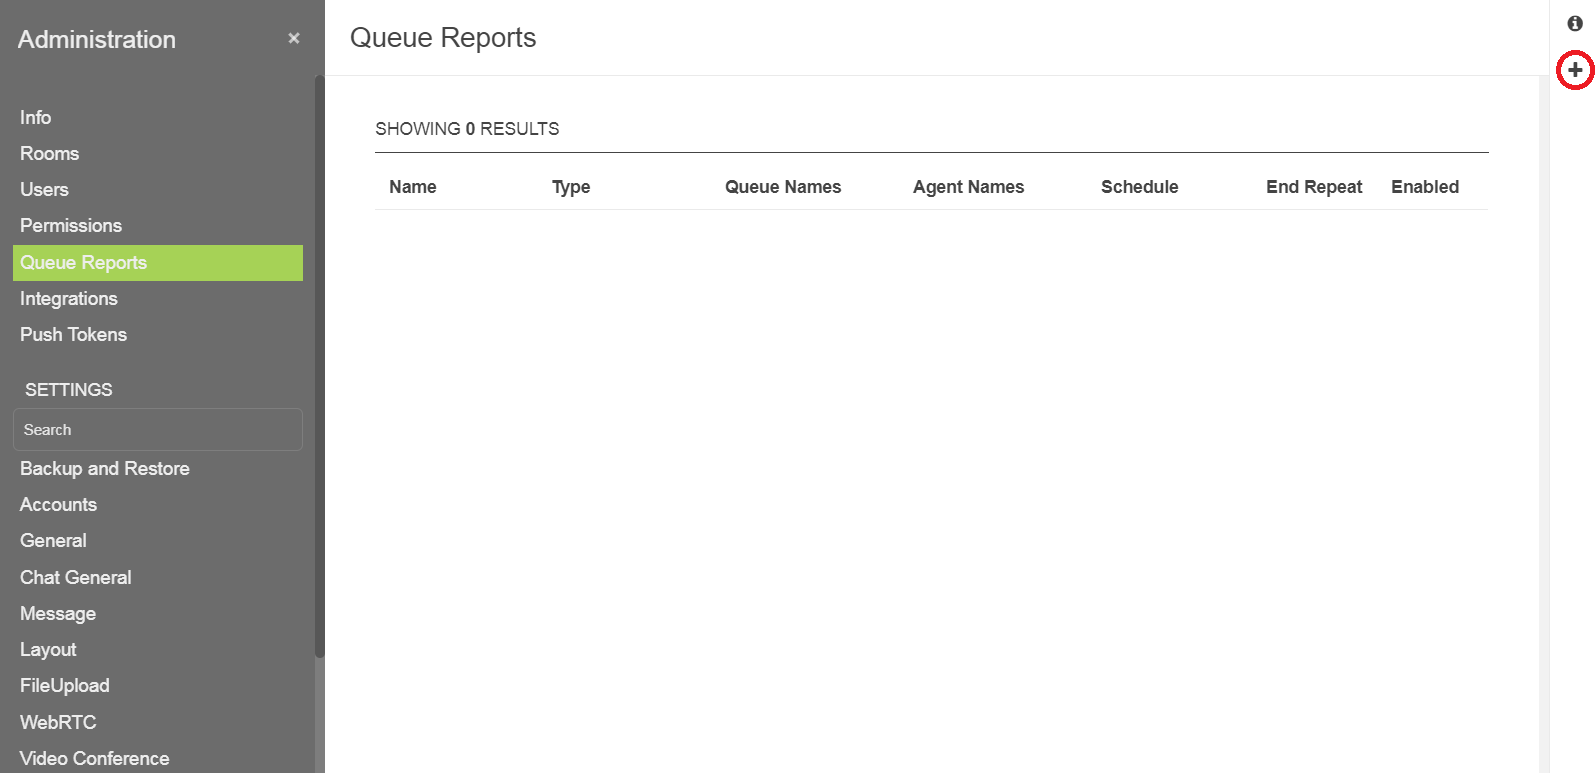
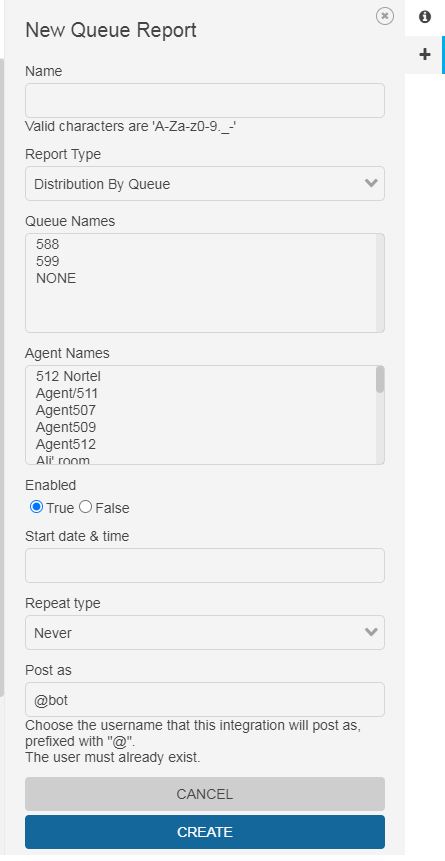
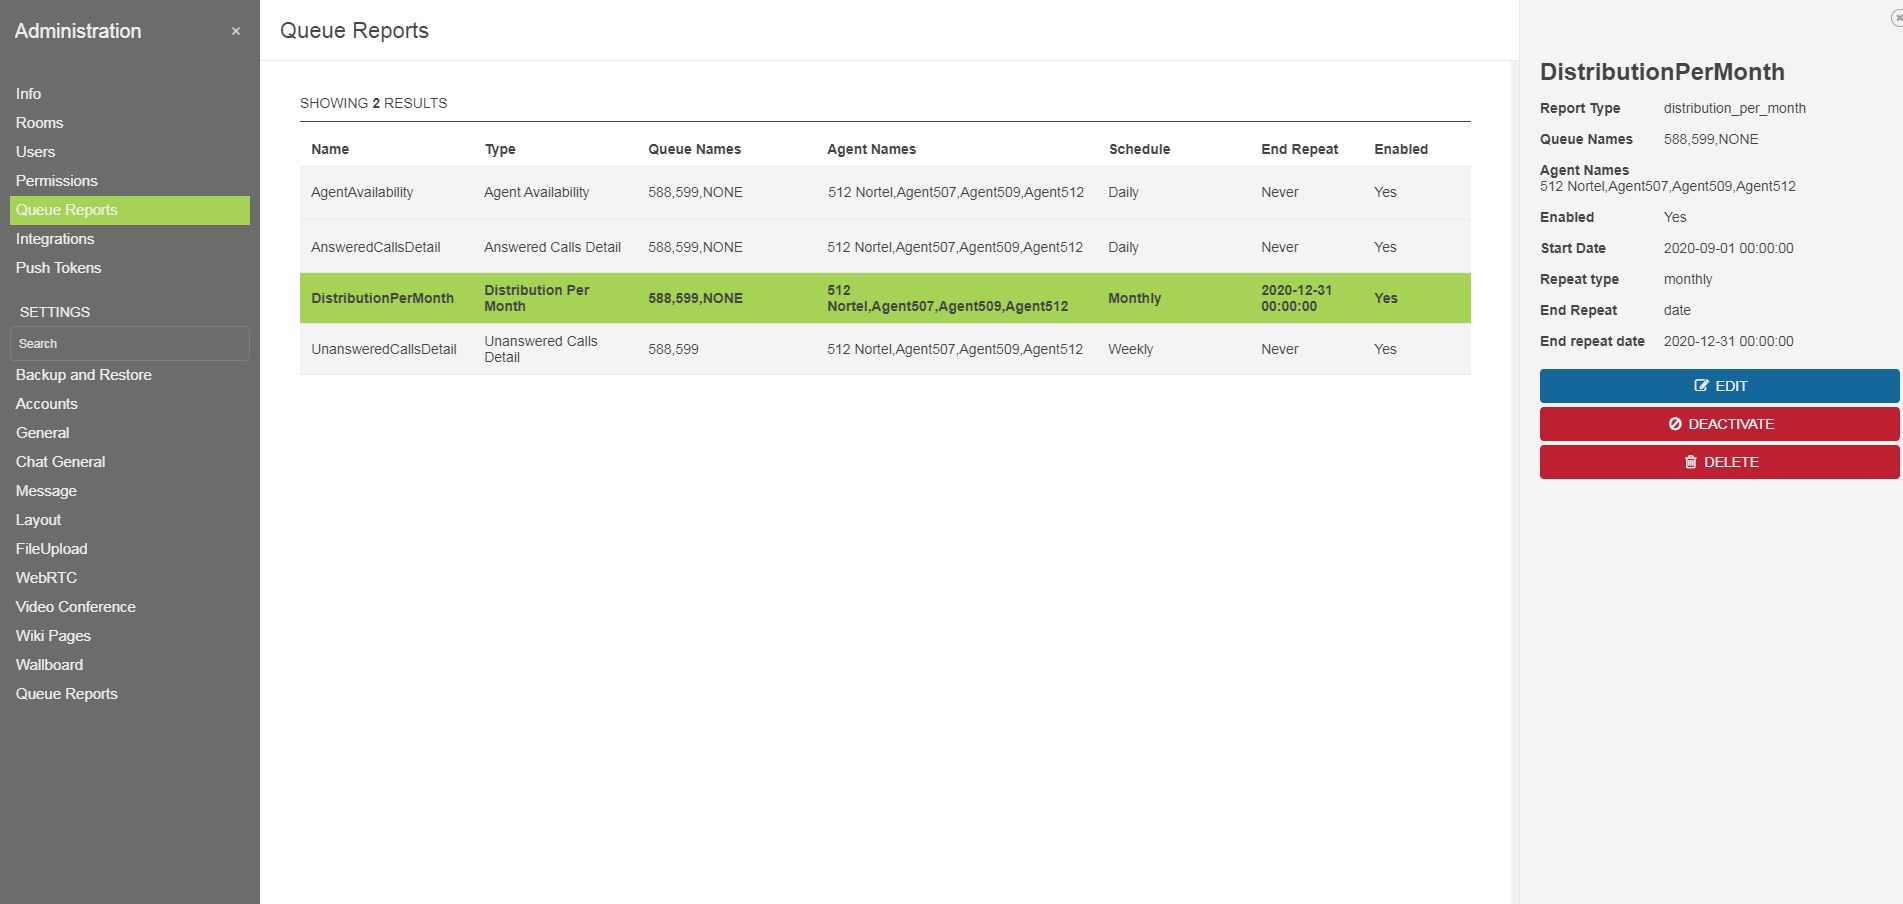
| Field | Description |
|---|---|
| Name |
Enter a name for the report. The report name is used as the channel name and therefore cannot match any existing chat channel names. Names can be any combination of upper and/or lower case letters, numbers, period (".") and underscore ("_"). No special characters are allowed. |
| Report Type | Select from the pull-down list. |
| Queue Names |
Select the desired queue(s). Press and hold the SHIFT or CONTROL key for multiple selections. By default, if none is selected the report will report on all queues. |
| Agent Names |
Select the desired name(s). Press and hold the SHIFT or CONTROL key for multiple selections. By default, if none is selected the report will report on all agents. |
| Enabled | The default setting is True. Set to False to disable the report. |
| Start date & time | Select the desired date and time to generate the first report. |
| Repeat type | Select from the pull-down list: Never, Hourly, Daily, Weekly, Monthly. |
| End Repeat | Select from the pull-down list: Never, End date, After count. |
|
End repeat - date & time
|
If End date is select, enter the desired date and time to end the report. |
|
End repeat - number of repeats
|
If After count is select, enter the number of repetitions. |
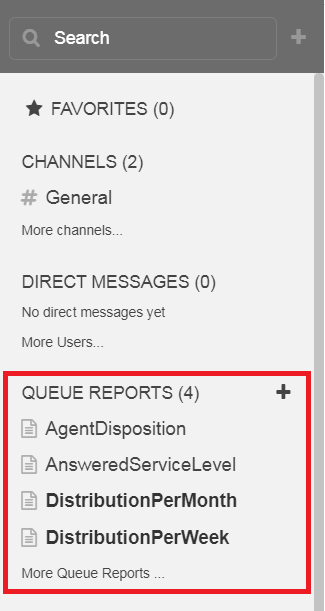
After the Queue Reports application has been enabled, you have to logout of InfinityOne and log back in to see the option for QUEUE REPORTS appear in the left navigation panel.
Click on More Queue Reports ... to see the list of available reports to join.
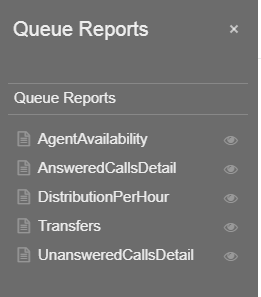
Click on the report name to preview the queue report.
Click on the JOIN button at the bottom of the page to subscribe to this report.
Repeat this for each of the reports that you intend to view on this account
All your subscribed reports will appear on the left navigation panel.
Instead of logging in to InfinityOne to view the Queue Reports, the administrator can setup email notifications whereby the reports are sent to all users who are subscribed to the report channel.
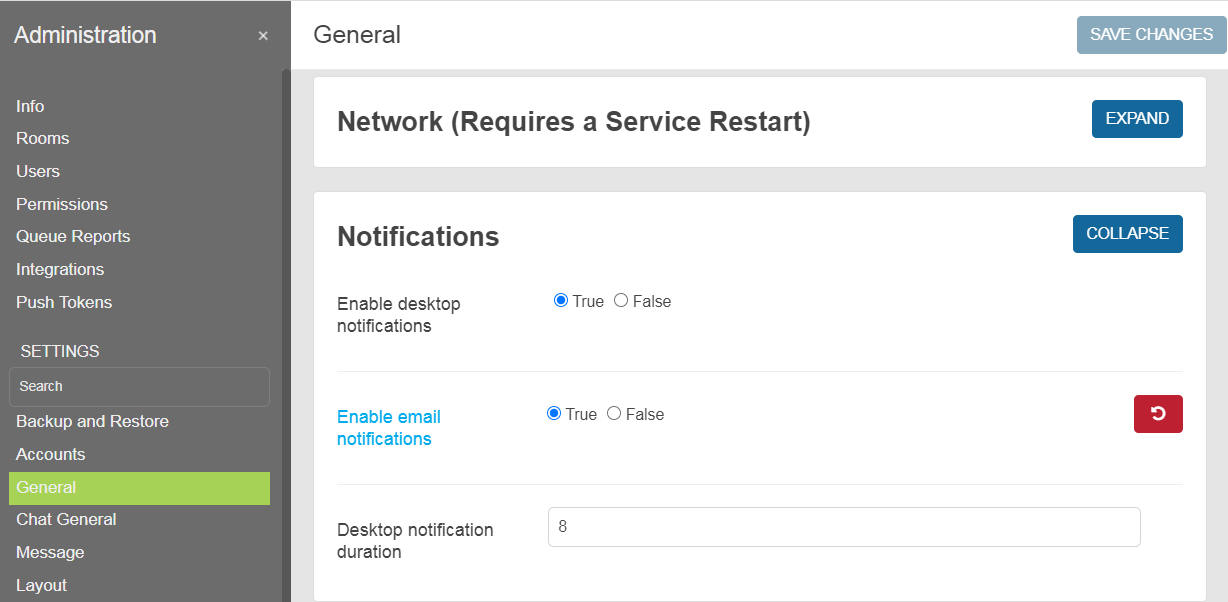
The user can click their username in the top left, then in preferences change the setting for Enable Email Notifications. Making this setting false turns off all notifications for the user. Turning it on allows notifications to be sent as configured.
Email notifications are only sent when specifically configured in a channel. They can be set in the channel as `default` to make use of the user level settings. When a user joins a Queue Report channel, the settings for the channel are automatically set to the default values below. These can be changed manually.
The Email Online setting indicates that the user will be emailed messages on that channel even when they are logged in to the system, but note that this does not occur if the user is currently in the specific channel when the message is posted. When a user receives an email from any channel there is an unsubscribe link at the bottom. Note that clicking on this link only unsubscribes the user from receiving emails for that channel. It does not cancel the channel subscription. If the user unsubscribes and later wishes to receive emails again they can click the Notification icon in the quick access menu bar and change the Email setting back to All messages.
By default, queue reports are created with the Post as user account "@bot". You can choose a different user account to Post as, or you can update the @bot account to have a valid email address.
The sender email address must belong to the same domain as the UCX Server.
The report will be emailed to all users who are subscribed to the report channel. The email is sent to the email address configured in the user's account.
Users can subscribe to the channel or their own, or they can be added to the channel. To add a user, type /invite followed by @user in the channel's message box. (See InfinityOne Release 2 - Slash commands for more details.)
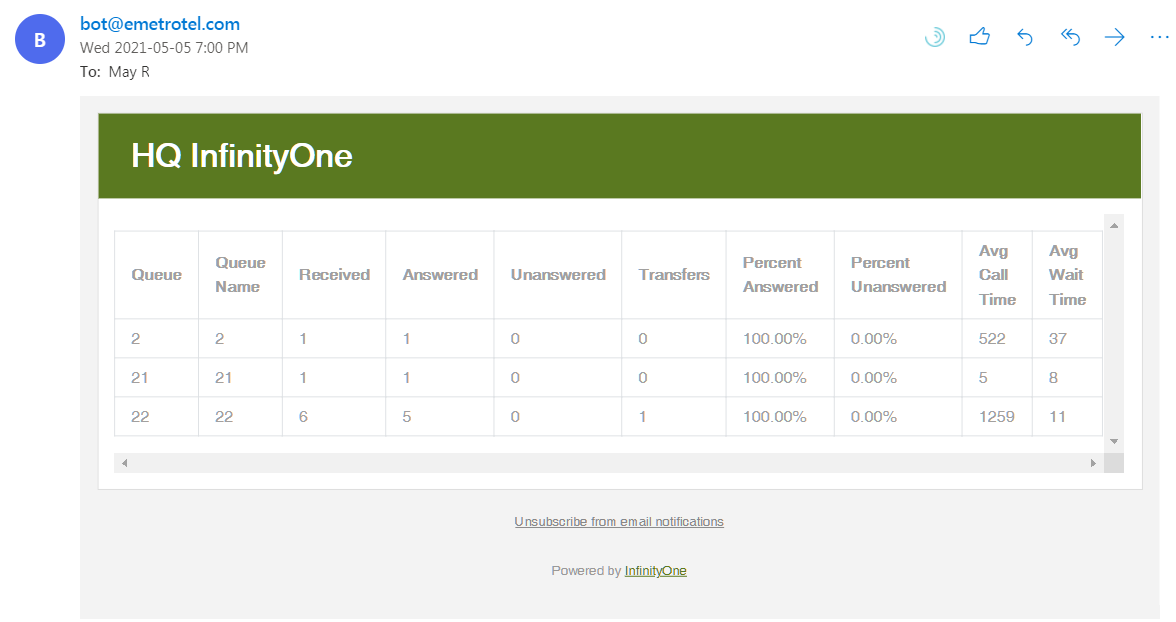
Below is an example of a report sent by email to users.
When viewing the report channel, there is an icon menu on the right hand side that provides quick access to information related to the report.
 |
Information |
 |
Queue Report Info |
 |
Members List Shows the list of users subscribed to the channel. Clicking on the user also displays the user details. A user can be given editing privileges to the report by selecting the button SET AS OWNER or SET AS MODERATOR. |
 |
Notifications Shows the notification settings for the channel. The settings can be changed here. |